Scheduling Onsite Service
This article covers how to schedule onsite appointments.
There are two ways to schedule a remote appointment, via our online appointment scheduler or manually on the technician’s Google Calendar. Prior to scheduling any appointment make sure the customer knows the fees associated with the service they are requesting. The rates are as follows:
| Residential Onsite Services | $100/hr (min. 1 hour) | | Business Onsite Services | $125/hr (min. 1 hour) | | Urgent/Same Day Service | $60 fee (if schedule allows) | | After Hours Service | 1.5x rate |
It is important to note, Onsite services are subject to mileage charges. We charge mileage fees at a rate of $1 per mile traveled outside of our service area. Services that require mileage fees to be billed will be calculated as follows:
| Formula | (m - s × 2) = fwherem = miles outside of our service areaf = final charges = service area radius | | Example | (35 - 30 miles) × 2 = final charge5 × 2 = final charge$10 = final charge |
Service Area
The service area is currently a 30 mile radius around our Greenville and New Bern locations. Any location within either radius will not be charged a mileage fee. Any location outside of the radius will be charged a mileage fee for all miles traveled outside of the service area.

Scheduling Workflow
- Confirm customer's issue and address
- Determine urgent status - "needs to be handled right now" vs "can be handled on our regular schedule" - inform customer of urgent fee where applicable
Determine when the customer wants to have the appointment
- If the customer wants to have the onsite outside of our normal working hours, inform them of the after-hours service fee (1.5x labor rate). Urgent fees will still be assessed.
- For after hours service, coordinate the appointment with the OnSite technician that will perform the work prior to finalizing the appointment
- Proceed to schedule the appointment according to the instructions below
Website Scheduling
Make sure the customer is aware of mileage charges prior to scheduling the appointment. When you go to our website to schedule an appointment you will land on a page similar to the one shown below.
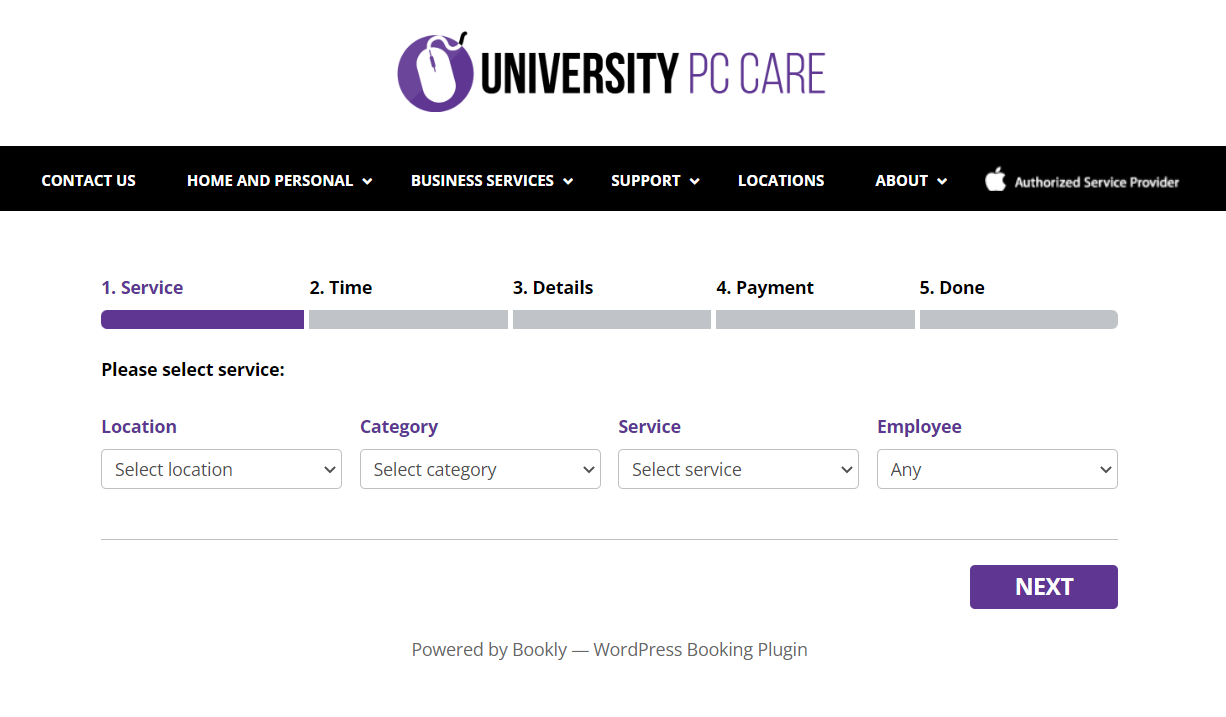
For onsite appointments, the location should be set to the nearest shop location to the location the onsite will be taking place. For example, if the onsite is taking place in Robersonville you would select Greenville as the location or if the onsite is taking place in Morehead you would select New Bern.
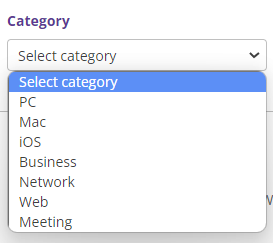
Category has a few options for the will result in onsite being an option under the service section (see image below). Select the one that is most relevant to the reported issues needing to be addressed.
Select PC or * Mac*, for computers, laptops, or printer issues. The services options will be as follows:
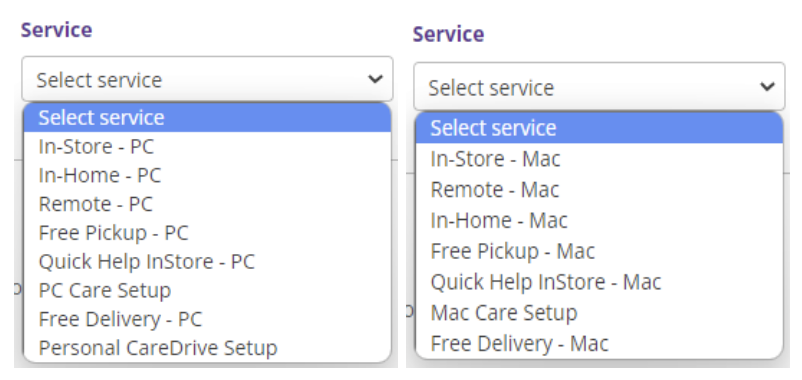
Then click the In-Home PC *or In-Home Mac* for residential and non-BizCare business customer onsites.
Select BizCare for customers that have a current BizCare service agreement. You should be checking in PCRT for the business before selecting this option. If they do not have a current plan then select PC or Mac to schedule. The services options will be as follows:
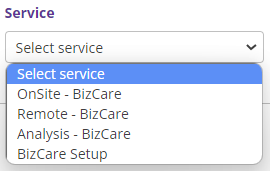
Use Onsite- BizCare. Remote for remote appointments, Analysis for prospective clients and BizCare setup for new sign ups or additional devices being added to accounts.
Select Network for reported network related issues. Prior to scheduling an onsite visit see if we can attempt to troubleshoot remotely if the issues are related to a singular device. The service options will be as follows:
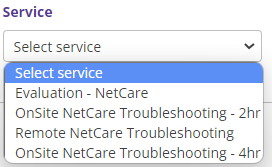
Use Evaluation-NetCare when the customer would like quotes or a discussion about network changes or upgrades. Evaluations themselves are free to the extent that mileage fees do not apply and the evaluation does not turn into a service call. Should either of these apply then a final invoice will be generated for the appropriate costs.
Use either Onsite NetCare Troubleshooting option for all other issues.
**IMPORTANT: select the correct category/service type to ensure the proper tech is assigned to the appointment
Based on the issue being reported by the customer, if you believe one technician would be better suited to handle the issue select that specific technician from the Employee list. If any technician will do, leave the Employee list as Any so that the soonest available technician is selected.
Once you have these preliminary selections made, click the Next button. You will then be taken to the calendar showing you the available appointments for service.
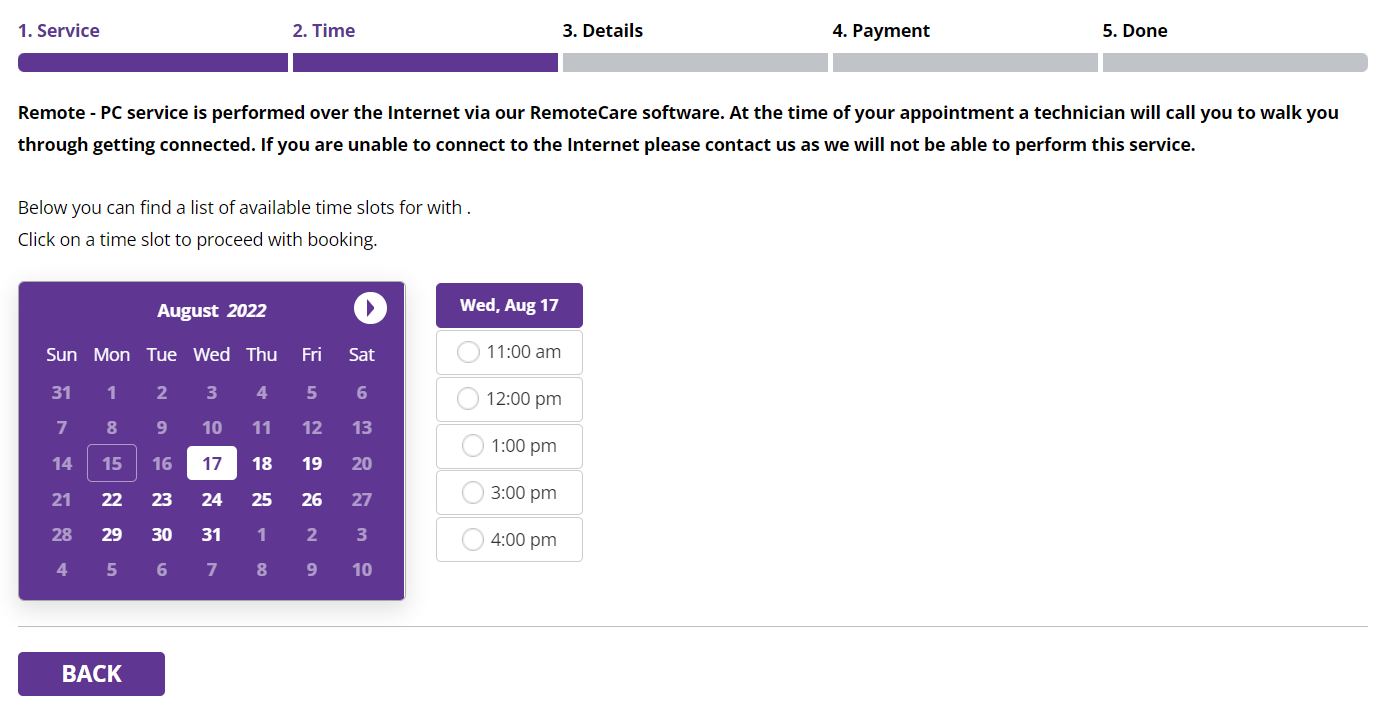
The calendar will show appointments available in the current month. If the customer is requesting to schedule an appointment for the following month, click the round arrow button at the top right of the calendar to view the next month’s available appointments. The calendar will only show 30 days of appointments from the date you are currently on. If they need something scheduled further out they will need to call back or schedule on their own at a later time.
Once the customer has settled on the date and time they would like to have service, click on the time. This will take you to the appointment information page similar to the image below.
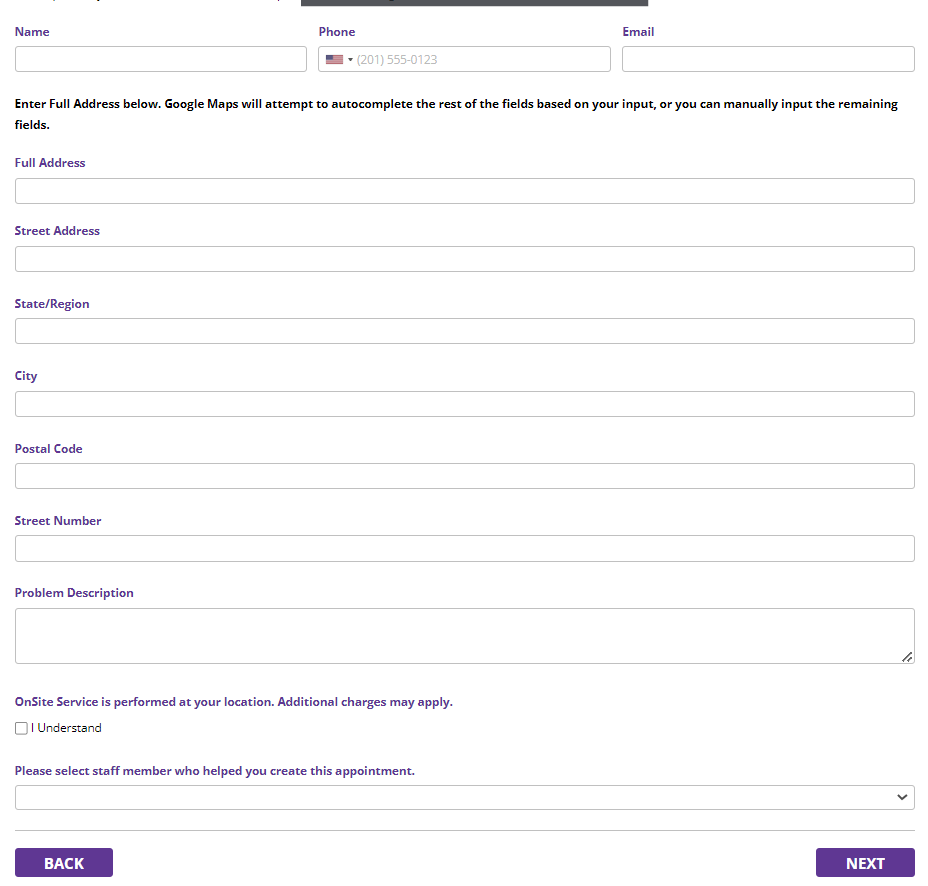
Fill in all the customer information. It is important that you double check the information entered as this is how the technicians will know where to go and how to contact customers before and after service.
Be clear when entering the problem description. For example, if the customer states their internet is out, ask some clarifying questions such as "are other devices connecting to the internet"? Then add the description appropriately based on their answers i.e., "device slow on start up".
For network onsites that report internet outage, ask if the customer has contacted their internet service provider (ISP) to see if there is an outage in their area or other issues on their end.
DO NOT leave the description blank or lacking information. For example, if the customer says their machine is not working, ask them clarifying questions. If they are unable to answer your questions or refuse to provide some description of the issue, use something along the lines of cx unable to provide specifics, troubleshoot based on tentative description.
For “Please select staff member who helped you create this appointment”, find your name on the list. If your name is not listed, select the corporate admin and send a message to Jesse S. (Vice President, IT) to update the website.
Click, Next to complete scheduling the appointment. If the appointment has been created you will be taken to a Thank You page as shown below. If you are taken back to the calendar, the appointment is no longer available and another date or time needs to be selected and the information reentered.
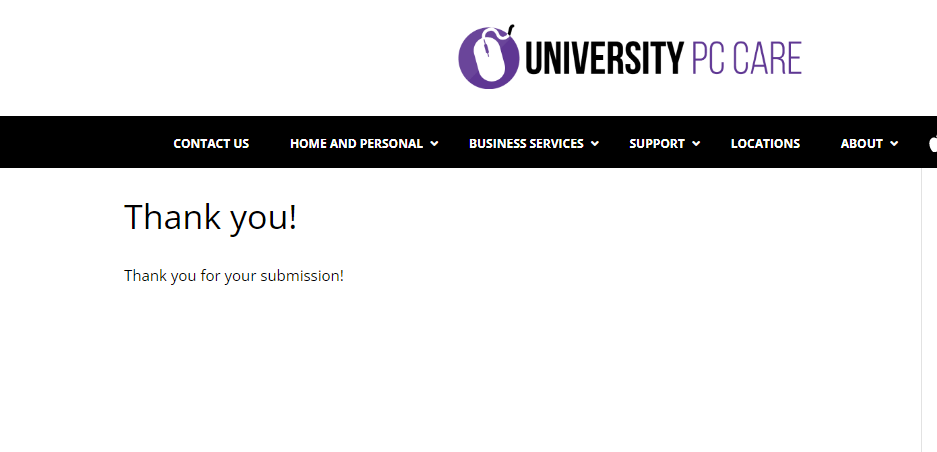
It is important to stay on the line with the customer until you get to the above screen. This will allow you to confirm the appointment has been scheduled or speak with the customer if you need to select another appointment time. This prevents you having to call the customer right back after disconnecting the call.
Manually Scheduling
In rare cases and for BizCare customers, you may need to manually create an appointment directly on the technician’s Google Calendar. You will need to have edit permissions for the technician’s calendar. If you do not have permissions, request it from the technician.
Once you have access to edit these calendars, click on the technician’s calendar on the date and time that you are scheduling the appointment for. This will cause an event pop-up to appear similar to the image below.
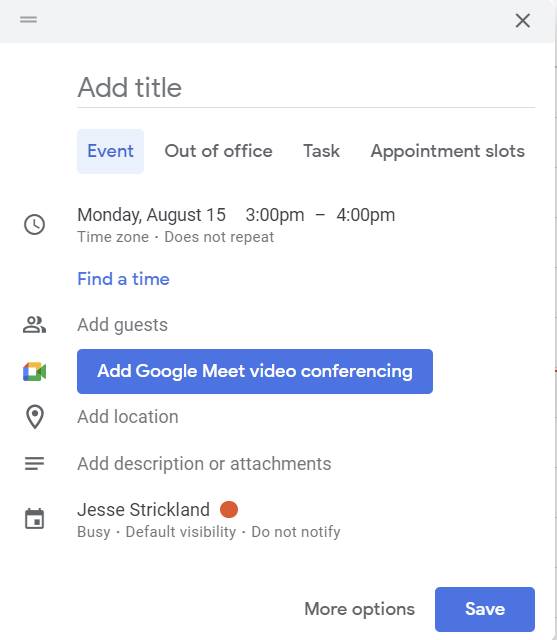
Where it says, Add title, enter Onsite- Device Type- Cx/Business Name. For example, Onsite- PC- University PC Care.
Add surrounding events to the scheduled onsite labeled Drive Time. Make the events equal to the estimated time of arrival from the corporate office with an additional buffer of 30 minutes. To find the drive time you should allow, enter the physical address into a google search then click directions. If GoogleMaps estimates 1 hour add 30 minutes making the drive time event 1.5 hours. This additional time to the estimated time of arrival will allow for any unforeseen circumstances.