Evernote File Management
This article covers how to use the Evernote program for file management.
In this procedure you will get a general explanation of how to use Evernote. We use Evernote for scanning and file management of incoming mailing, important documents, and general recordkeeping. The system uses “notebooks” and “stacks” to organize the files. Essentially, a notebook is a subfolder and a stack is the main folder. Each file is saved as a “note” in the notebook. You cannot save notes into stacks without it being in a notebook.
For more indepth use information, visit the Evernote Help & Learning page of their website.
For technical support, visit the Contact Us page of their website. You may need to login to the Evernote account to gain access to specific support options.
At the corporate office you will use the Evernote branded ScanSnap scanner. It’s a trifold scanner that is connected to the downloaded Evernote application. The scanner has additional pieces that can be extended when the device is open to support longer documents.
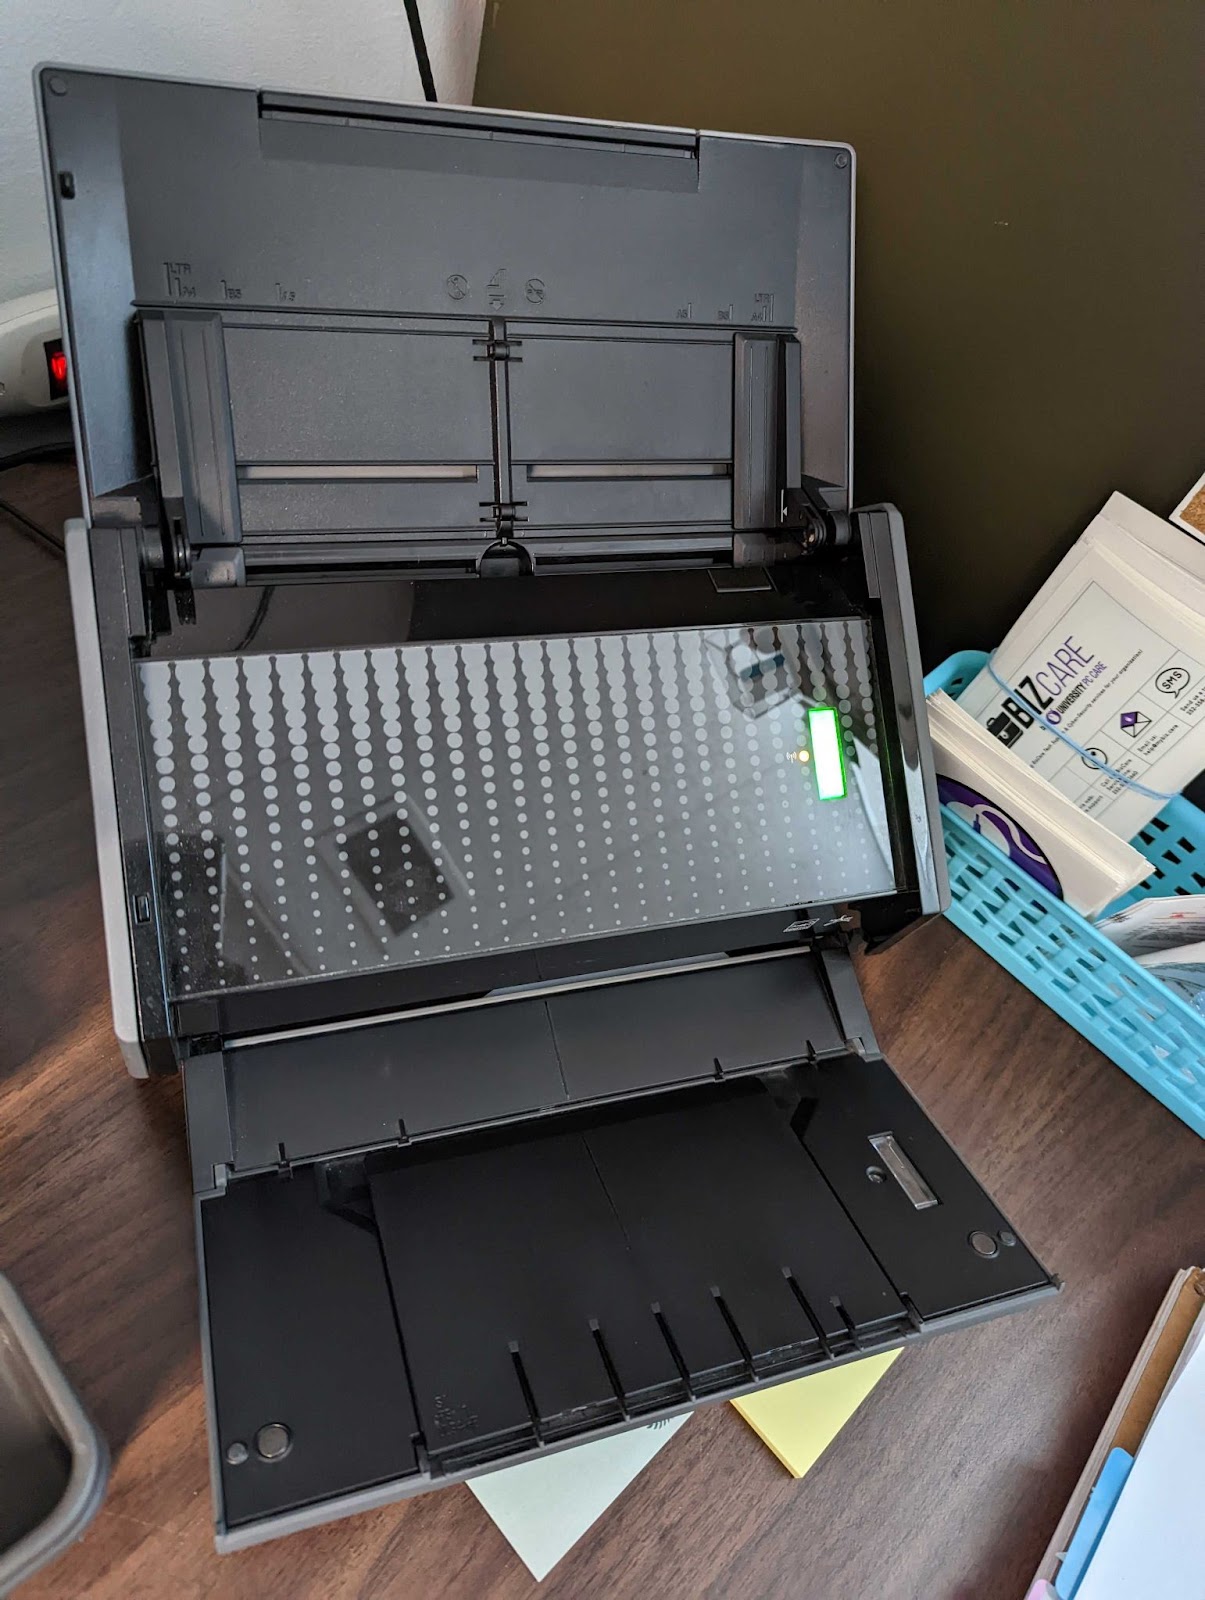
There are also two side bars that can be moved to the center of the feed tray to stabilize narrow documents while scanning such as receipts.
It is hard to see in the photos provided but there are etching on the scanner with standard sizing guides for specific document types. You can use these as references when preparing to scan.
The scanner can be used via WiFi or hardwired connection. For the best scanning experience it is recommended to have it hardwired. It should already be connected to a workstation in the office. If it is not, set up the scanner to the workstation.
Note: There are many things that can be done in Evernote, this procedure highlights the main functions we use it for.
Scanning Documents
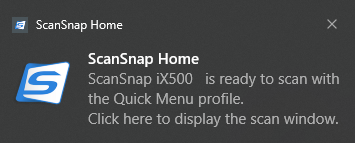
After the scanner has been setup and you open it to scan, you will get a pop-up on your screen similar to the one shown below when the device is ready for use.
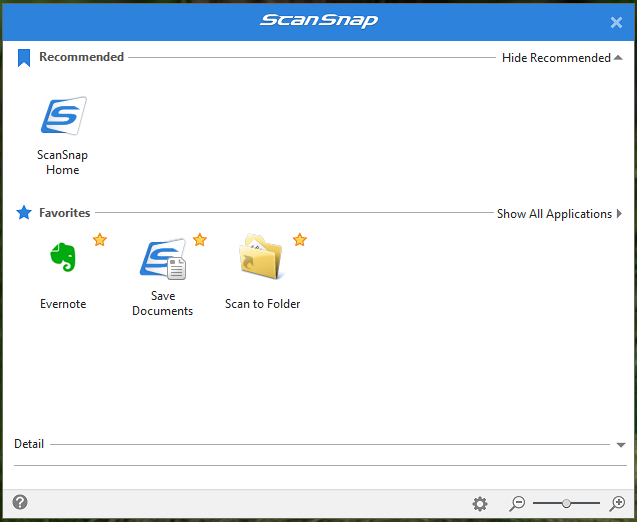
Make sure to have the Evernote application open before beginning to scan. The only button on the scanner is the one used to start scanning the document. This button should be green as shown below before you are able to scan.
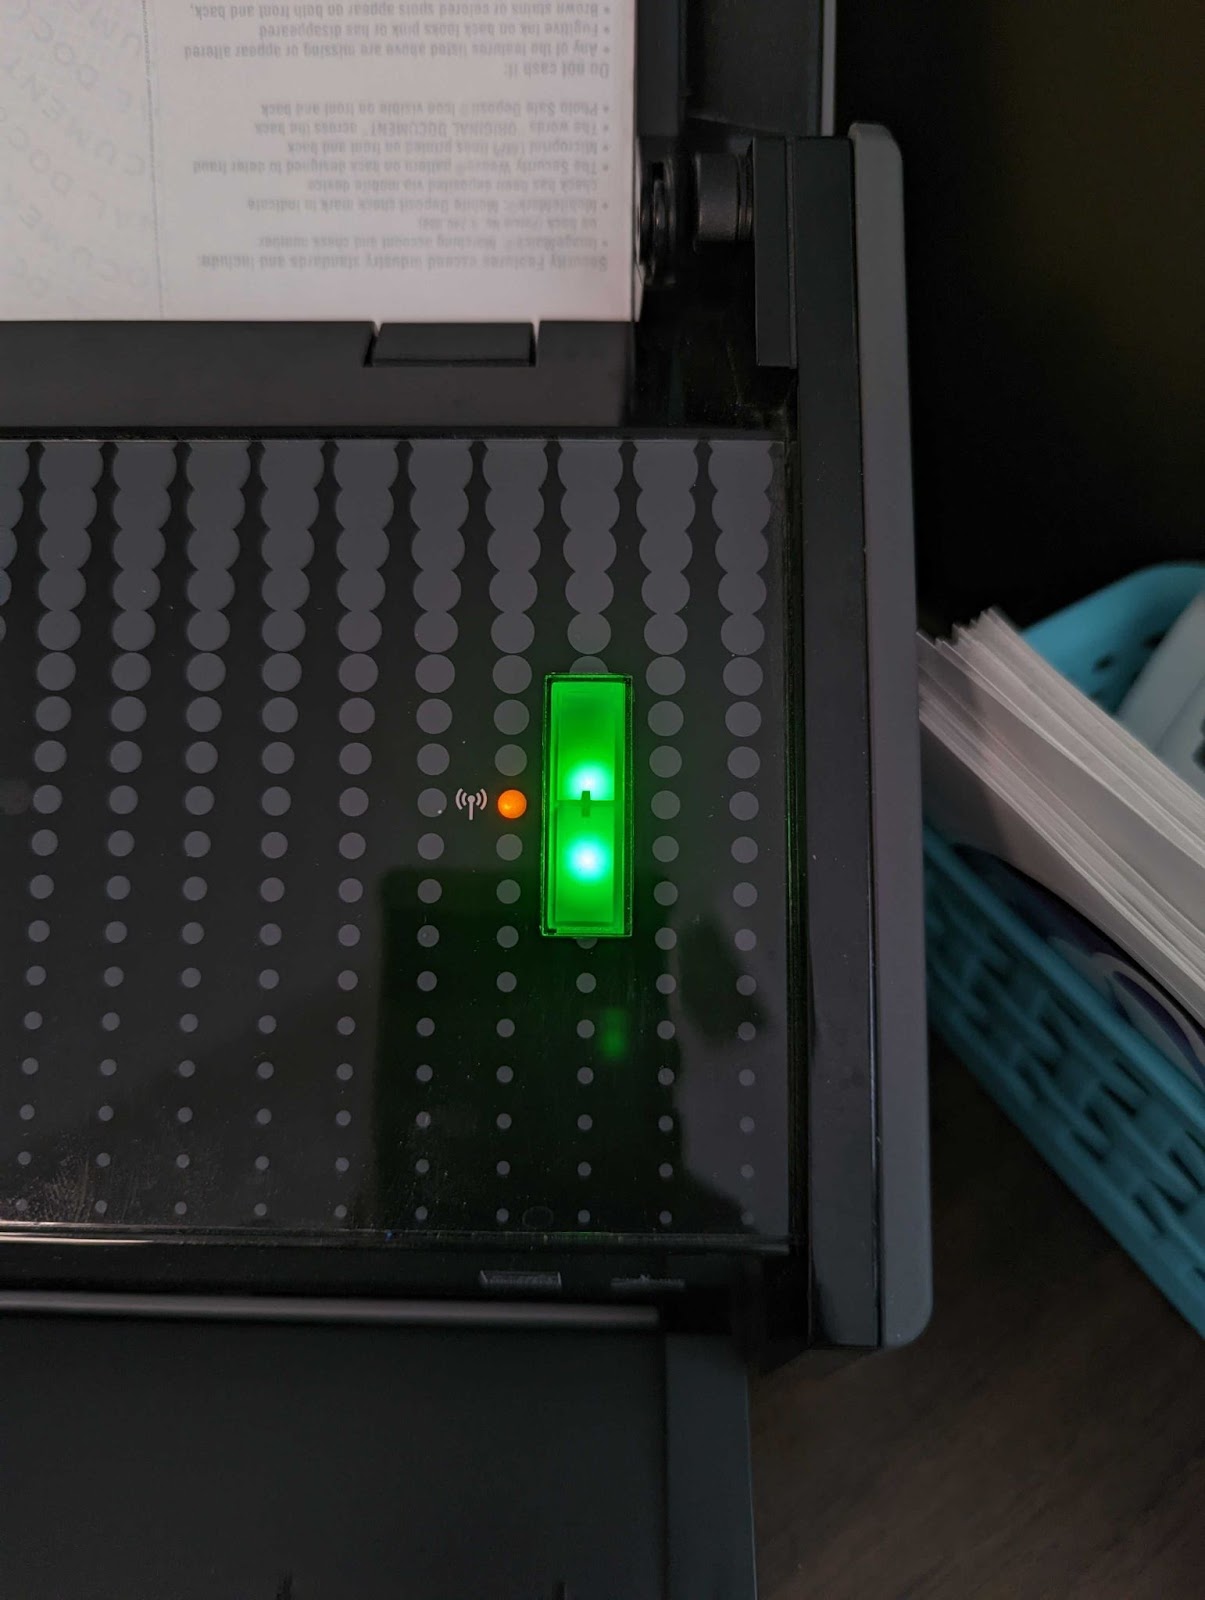
Place the document face down in the feed tray, then press the green button to begin scanning. If the document is double sided you don’t need to take additional steps. The scanner is built to scan both sides of the document in one single pass.
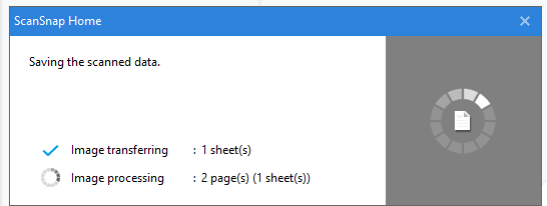
While the document scans, a ScanSnap pop-up will appear showing you that the scan is in progress.
Once the scan is complete, a ScanSnap window will appear providing you with save options. Select Evernote from the available options.
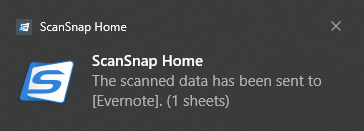
Simultaneously, two things will occur. A ScanSnap notification will appear confirming that the file has been sent to Evernote.
At the same time, Evernote will open and import the file to the system. A notice will appear once Evernote has opened stating the file import is complete. It will also state the location of the file in Evernote. By default, all scanned files should be imported to the To Be Sorted notebook.
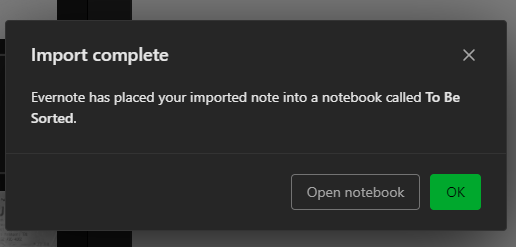
If you’ve used Evernote in the past on the workstation, it will default to opening the last notebook you worked in. If it was not the To Be Sorted notebook, click the option labeled “Open notebook”. Otherwise click “Ok”.
If you have multiple documents to scan, take no action in Evernote at this point. Add the next document face down into the feed tray and scan repeating the previous instructions until you have completed scanning all of the documents. At that point, click one of the available options on the “Import Complete” pop-up.
Sorting Scanned Files
Renaming Notes
By default, scanned documents are uploaded into the To Be Sorted notebook. Each note is named automatically with the date and document number. The document number represents the number of documents scanned that day. For example:
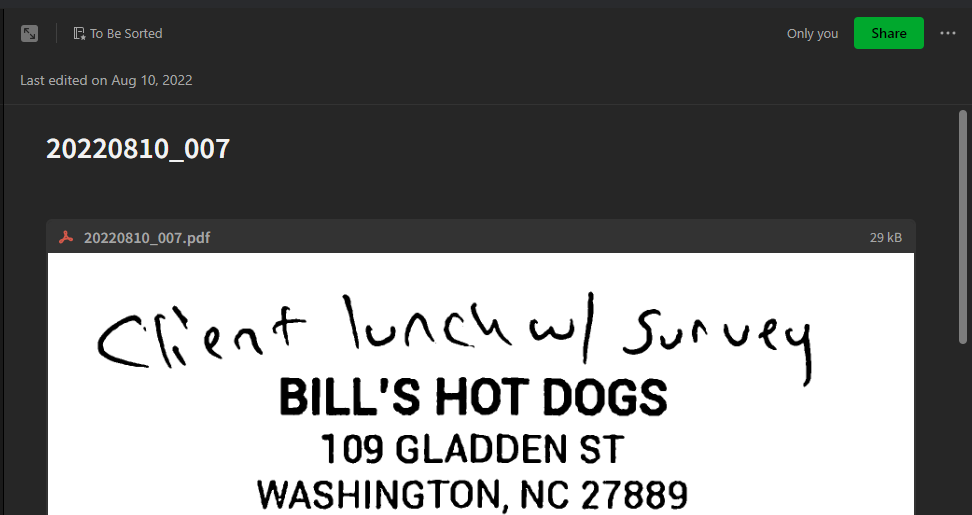
The note name is listed in the top left as _ 20220810 _007 _. Before the underscore is the date and after is the document number. From this you can tell that this document was the seventh (7th) file scanned on August 10, 2022.
Now on to editing the name. Using the same example above. Double-click on the note name to highlight it Then begin to type the new name of the note. Below is a list of guidelines for naming notes. These are guidelines for what has already been saved in the system. If there is a new file type, use context from the file itself to name the note.
Guidelines:
- For checks: [CustomerName]- [Check#]
- For purchase receipts: [StoreName]- [TransactionDate]
- For notices & correspondence: [Reference]- [NoticeDate]
- For invoices: [Invoice#]
Moving Notes
Once the note has been renamed appropriately, you will need to move it into a notebook. There are two ways you can do this.
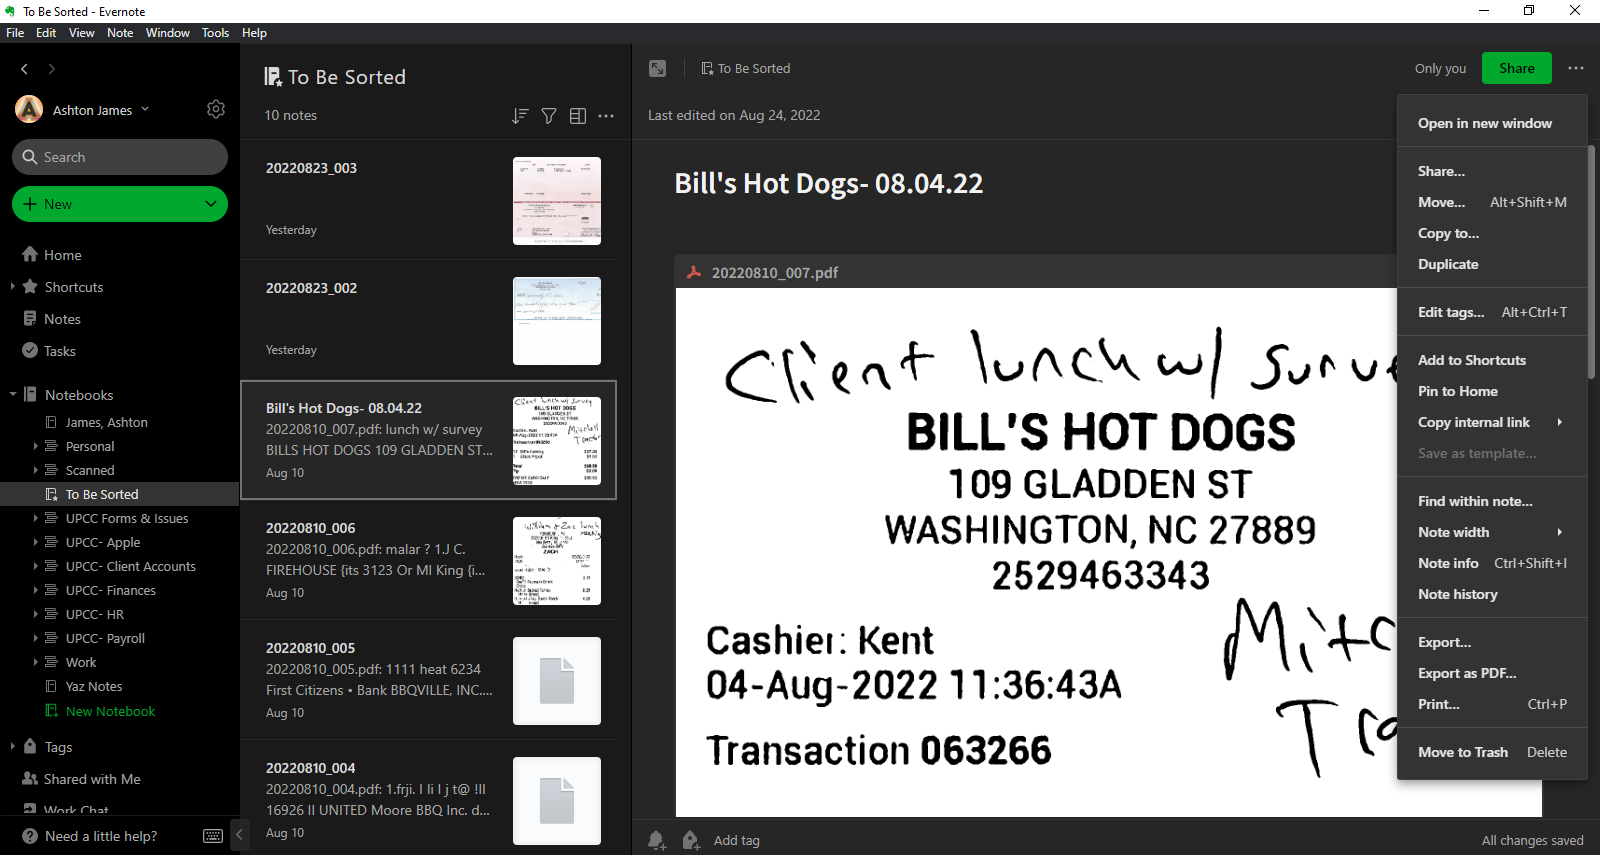
You can click on the ellipses in the top right corner of the note to expand the actions menu. Click Move… The other way is to do the keyboard command shown next to action on the menu. For Windows OS it is Alt+Shift+M. With either method, you will have a pop-up appear showing where the file can be moved to as shown in the image below.
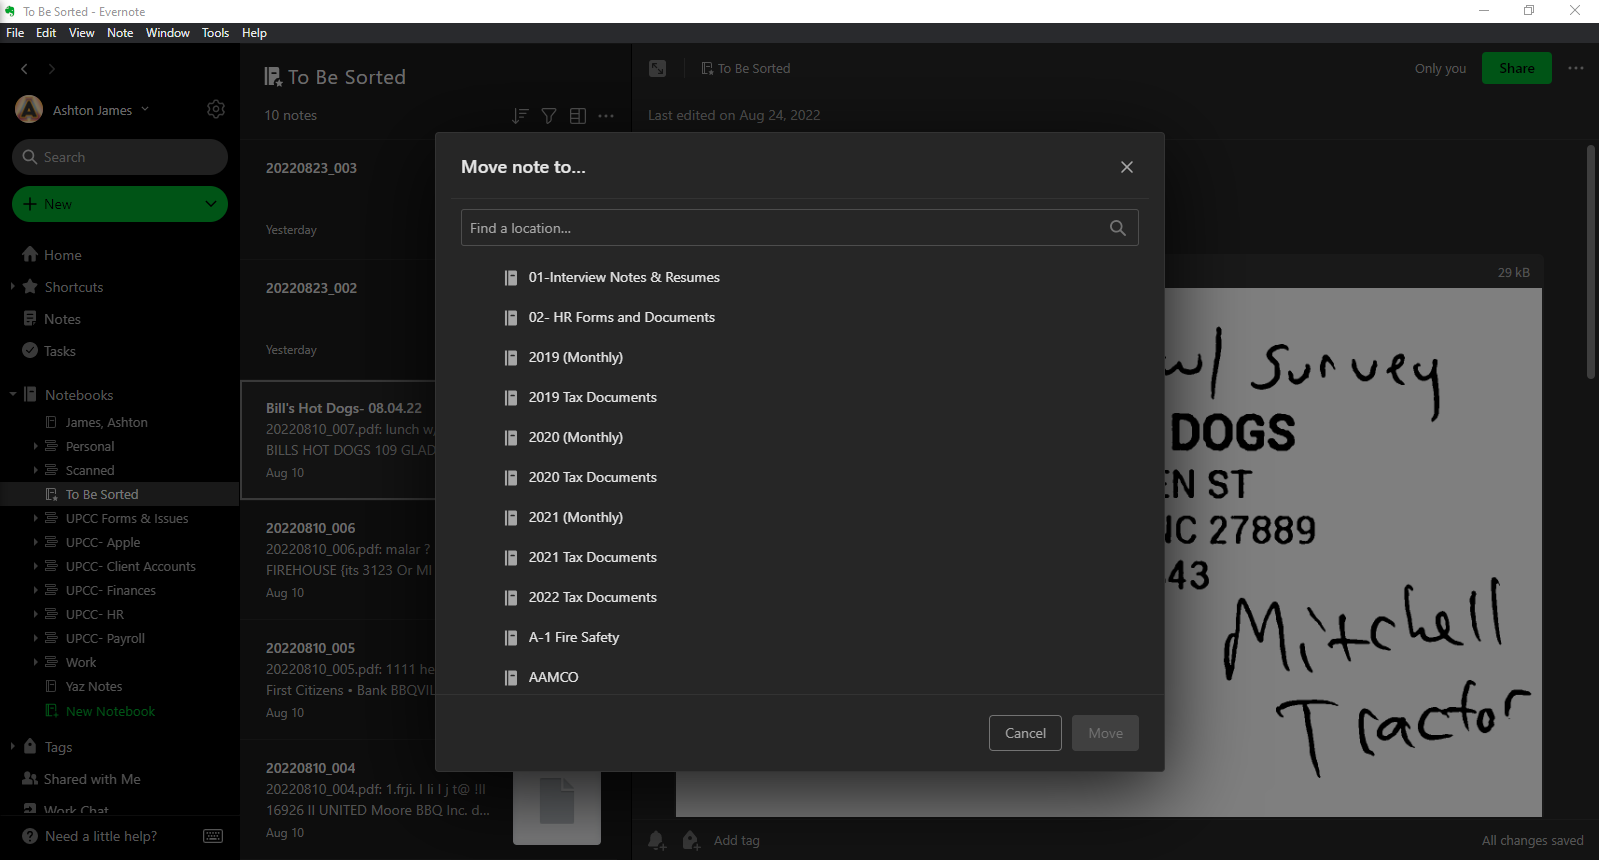
In the text field type the name of the notebook you are looking to move the note to. As you type the system will sort the available options and show you any matching what you have entered.

Select the appropriate notebook to move the note to from the options shown.
If the notebook you need doesn’t exist (for instance if it's a new tax year or a new company we haven’t worked with in the past) you will need to make a new notebook. See the Creating New Notebooks section of this procedure.
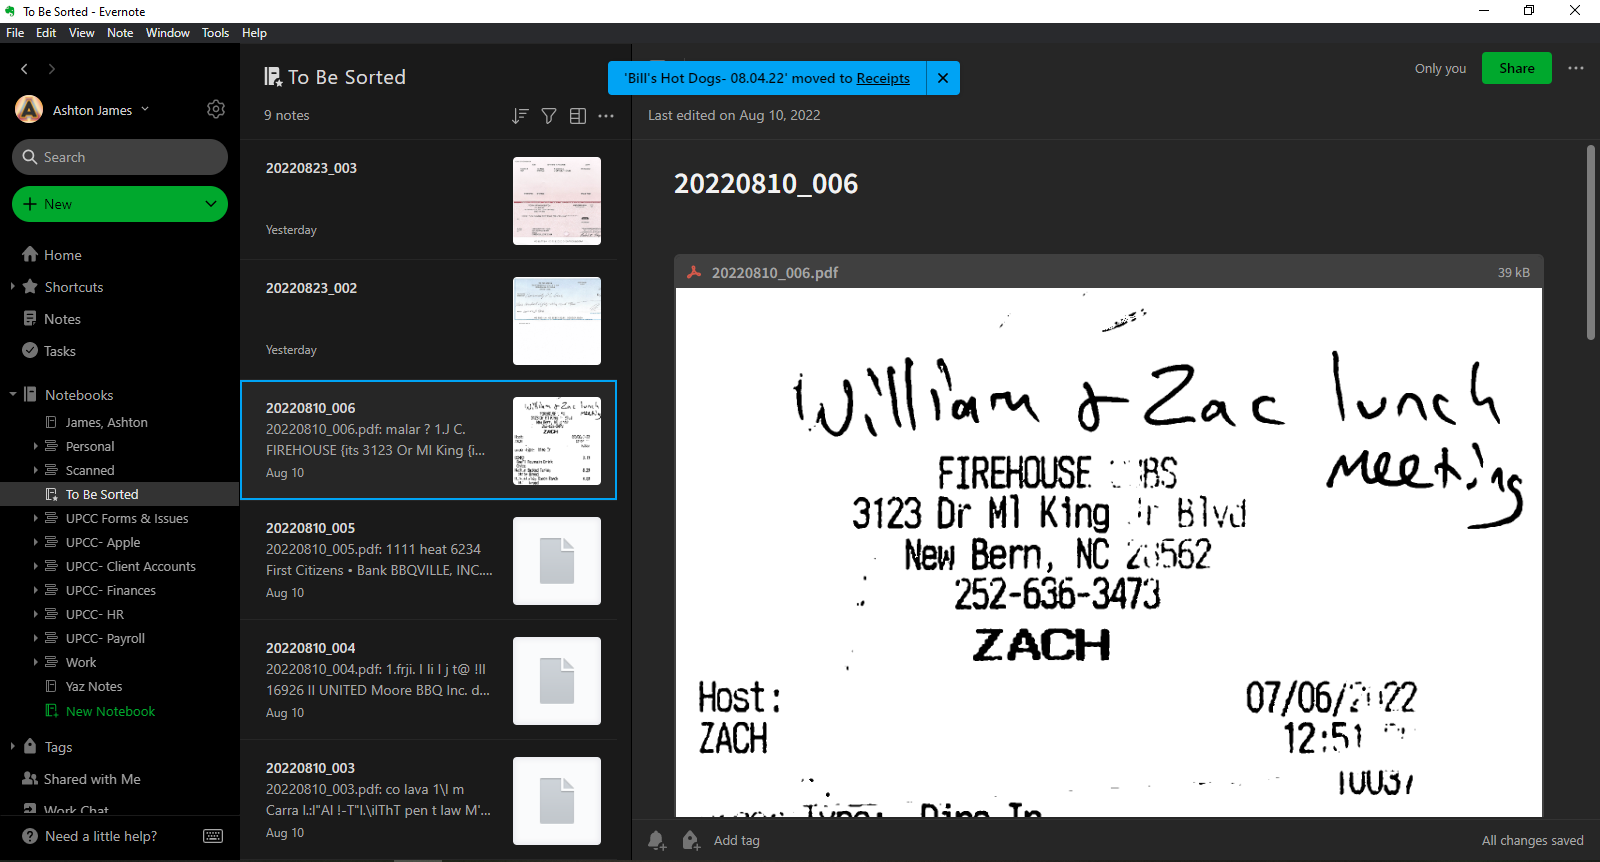
After you have selected the notebook from the list, click on the green Move button at the lower right corner of the pop-up. The pop-up will close and a blue notice will appear at the top of the screen stating the move has been completed and it will auto select the next note in the list for viewing.
Creating New Notebooks
There are four ways to create a new notebook. Choose whichever method is most convenient for you. First method is going File in the top left corner of the Evernote window.
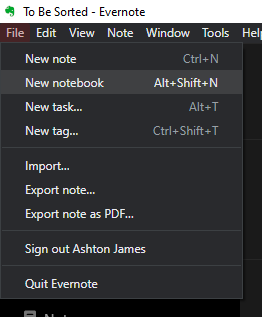
Listed you will find the New notebook option. Next to the text is the keyboard command to create a new notebook which is another method that can be used.
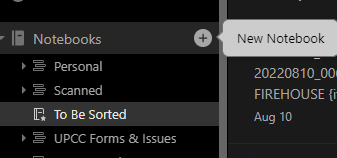
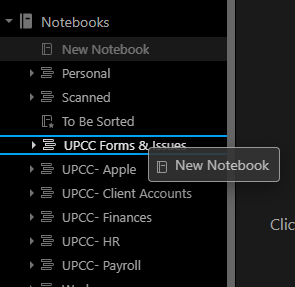
The next way you can create a new notebook is by going into the left-hand column and hovering over the Notebooks title. A “+” will appear to the right of the title. Click this button to create a new notebook.
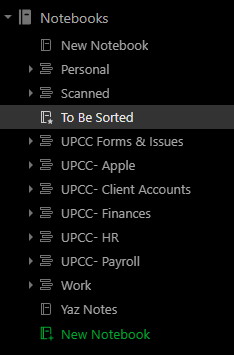
The last way you can create a new notebook is by looking in the left-hand colum towards the bottom of the Notebooks section. You will find green text “New Notebook”. Clicking here will create a new notebook.
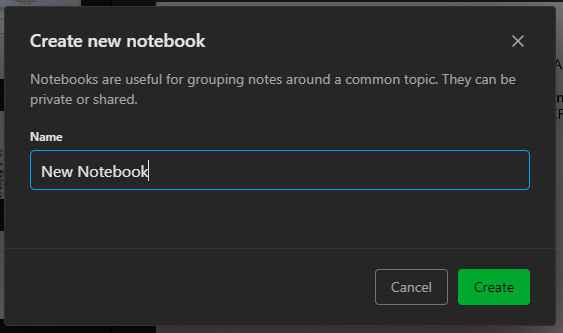
With either of the four methods, you will open the _Create new notebook_ pop-up. Enter the name you wish to use for the new notebook.
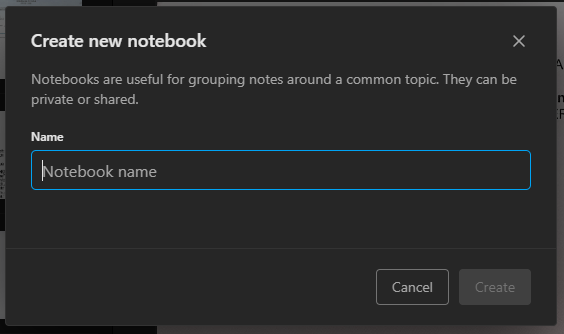
The Create button will remain grayed out until you enter text into the text field. It will turn green afterwards. Click the now green button to create the new notebook.
The new notebook will appear listed in the left-hand column under the Notebooks title.
Creating New Stacks
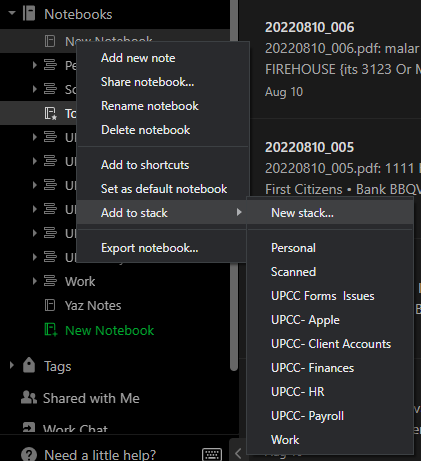
To create a new stack, right click on a notebook to open the actions menu. Locate and hover over Add to Stack to expand the next actions menu. Then click New Stack… from the listed options.
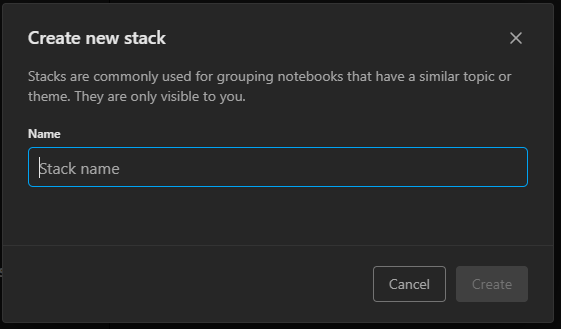
The Create new stack pop-up will appear.
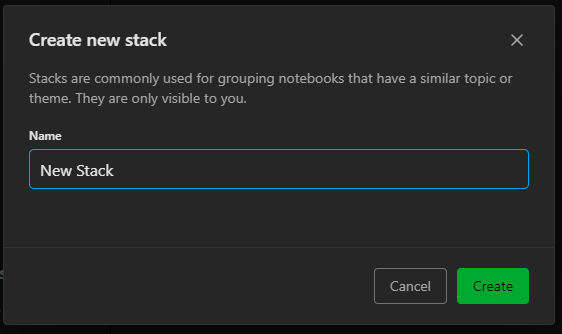
The Create button will remain grayed out until you enter text into the text field. It will turn green afterwards. Click the now green button to create the new notebook.
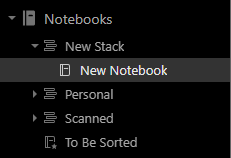
The new stack will now appear in place of the notebook with the notebook nestled in the stack. You can access the notebook by clicking the small arrow to the left of the stack title to see the notebooks nestled in the stack.
Moving Notebooks into Existing Stacks
There are two ways to move notebooks into stacks. Similarly to how you created a new stack, you will right-click on the notebook, navigate to and hover over the Add to stack option to expand the next menu.
Click the stack you would like to move the notebook to from the list. Once it has been successfully moved, a blue notice will appear at the top center of the screen confirming the action.

The other way you can move a notebook into an existing stack is to simple drag the notebook to the stack title you want the notebook to be nestled into. A blue outline will appear around the stack titles indicating which you are hovering over to avoid dragging and dropping into the incorrect stack.
Once it has been successfully moved, a blue notice will appear at the top center of the screen confirming the action.
Removing Notebooks from Stacks
To remove a notebook from a stack, right click on the notebook. Out of the available options on the menu that appears, select Remove from stack.
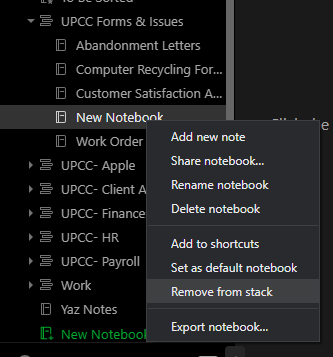
A blue notification will appear in the top center of the screen confirming that the action has been completed.

Importing from Desktop/External Source
If you have files on your computer or external source (i.e. flash drive, external harddrive, etc.) you can simply select the items from their current file location on the computer or external source and drag them into the Evernote notebook you would like to include them in.
If an error occurred during the import process you will receive a notification in the center of the screen.