Consignment Return
This article outlines how to process Consignment Return through GSX via Ground Shipping as well as organizing the files in Google Drive.
You will need to have certain permissions in GSX under your technician delegation in order to process a Bulk Return. Permissions can be granted by the Account Administrator. You’ll also need access to the Apple FedEx account. Username and Password can be provided by the store manager.
Bulk Return Process
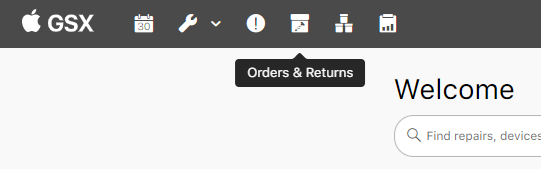
With your company Apple ID and password, sign in to GSX. Make sure your Ship-To address is set to the store you are looking to process the return for. Once signed in, locate the “Orders & Returns” tab (shown as a box with a screw) in the top left-hand bar.
By default, you will load into the “All” page of the Orders & Returns. Click on the blue Create button to the right.
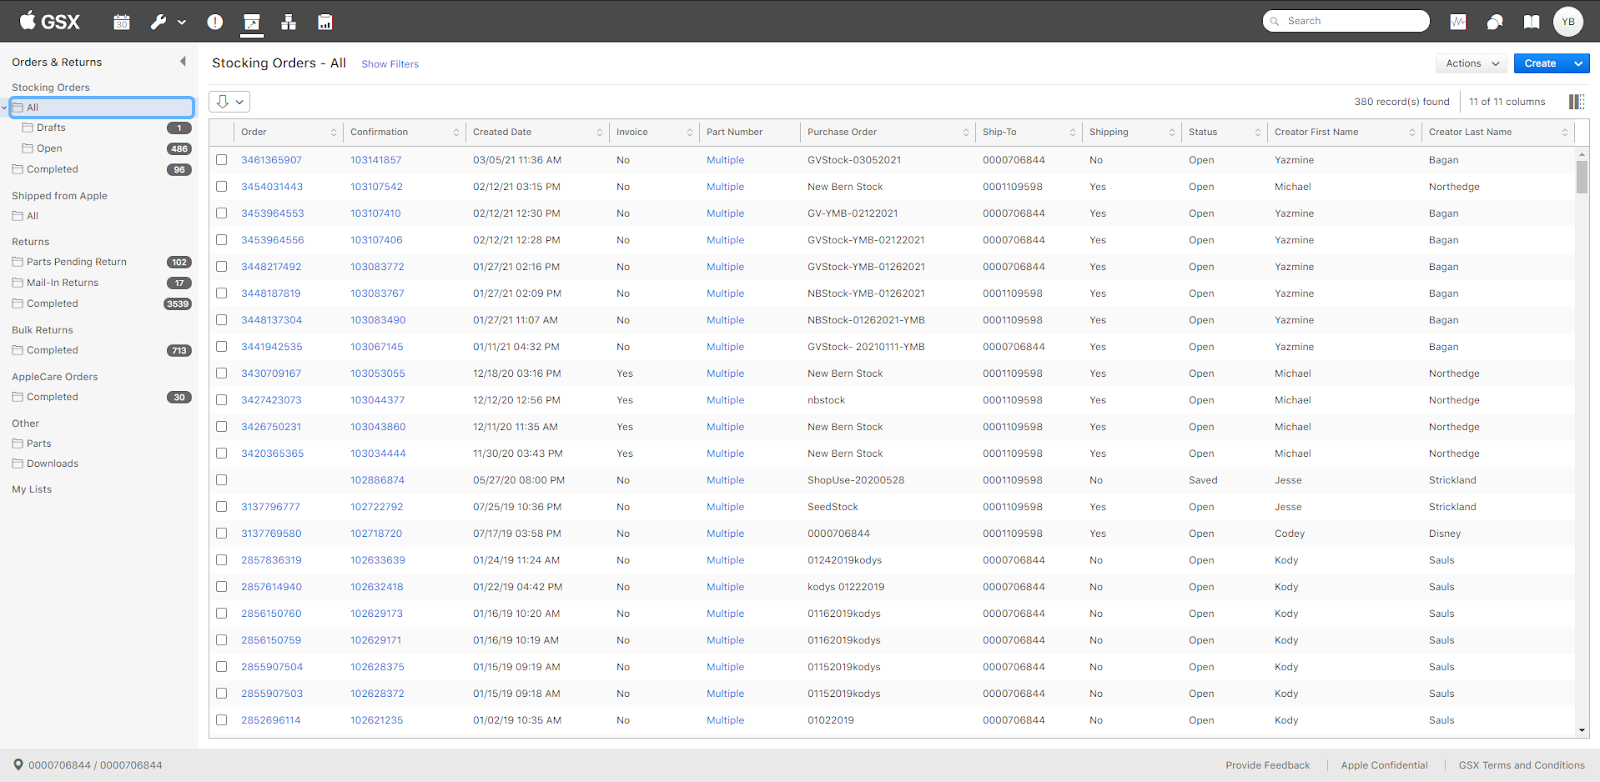
A menu will appear from the blue *Create *button, select Create Bulk Return.
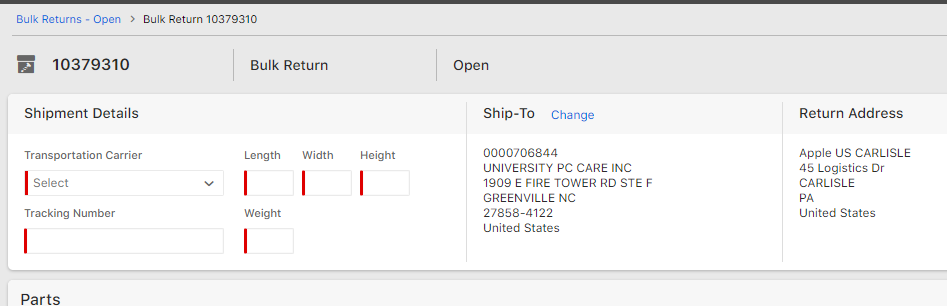
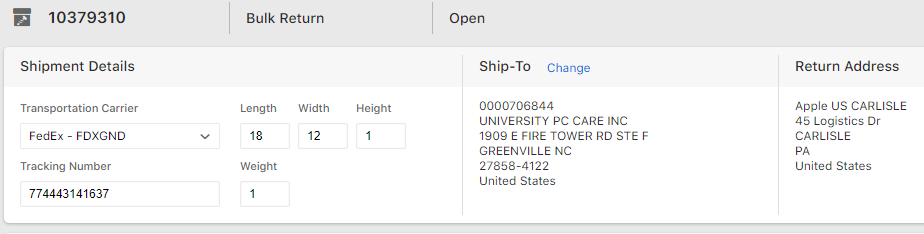
The Bulk Return page will load and look similar to the image below. Notice the red indicators in the left-hand section labeled Shipment Details. This is very important to fill out. You will not be able to submit the return without this information. In the center column labeled Ship-To, make sure the location listed is the same as the store you are currently doing the return for. This is the last chance you will have to change the Ship-To. The Return Address will automatically fill after you have saved the Bulk Return the first time.
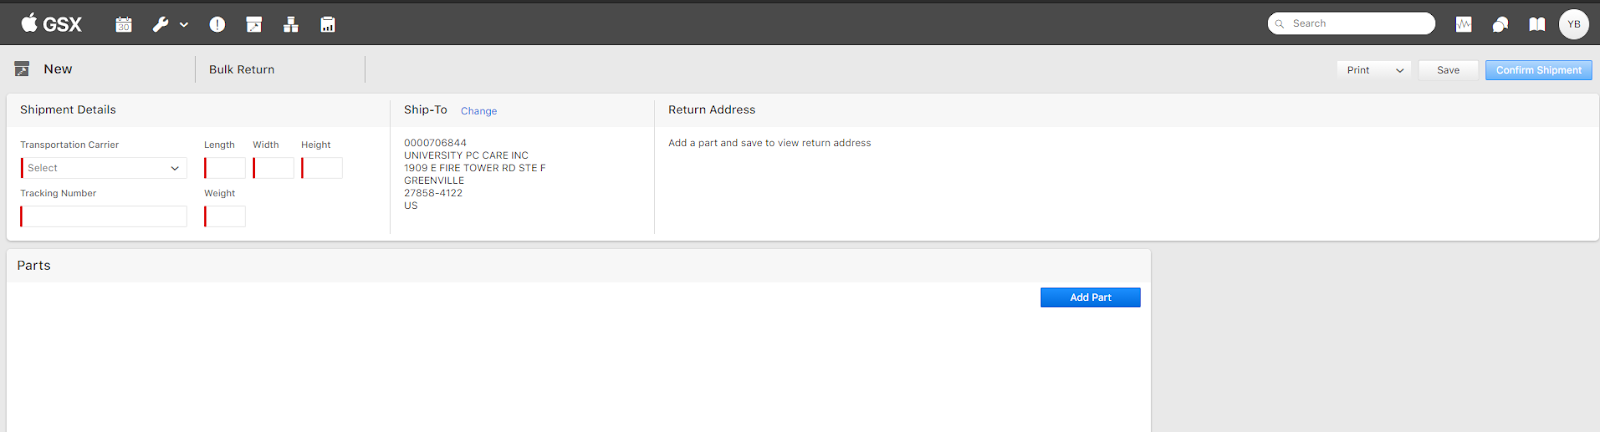
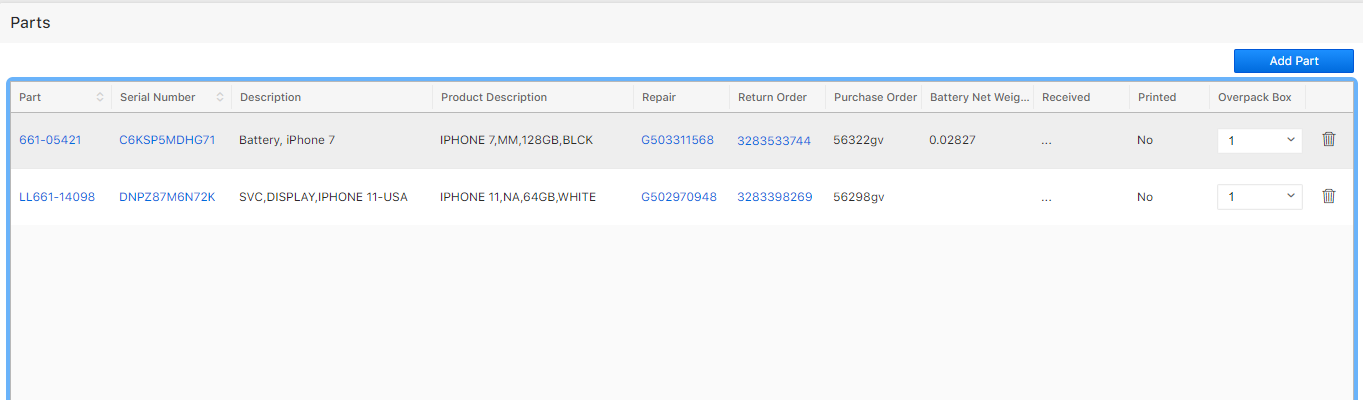
Next, you will click on the blue button labeled Add Part. A pop-up window will appear with all the available parts pending return.

Begin to type the Work Order ID into the search bar. If the repairs were labeled correctly from the start, you should see the large list reduce down to the single item you are looking for. Click the checkbox to select the item. If you have multiple items to send off, leave this item selected and go back into the search bar to type in the next Work Order ID. Again, click the checkbox and move on to the next item. Continue until all the items have been selected.
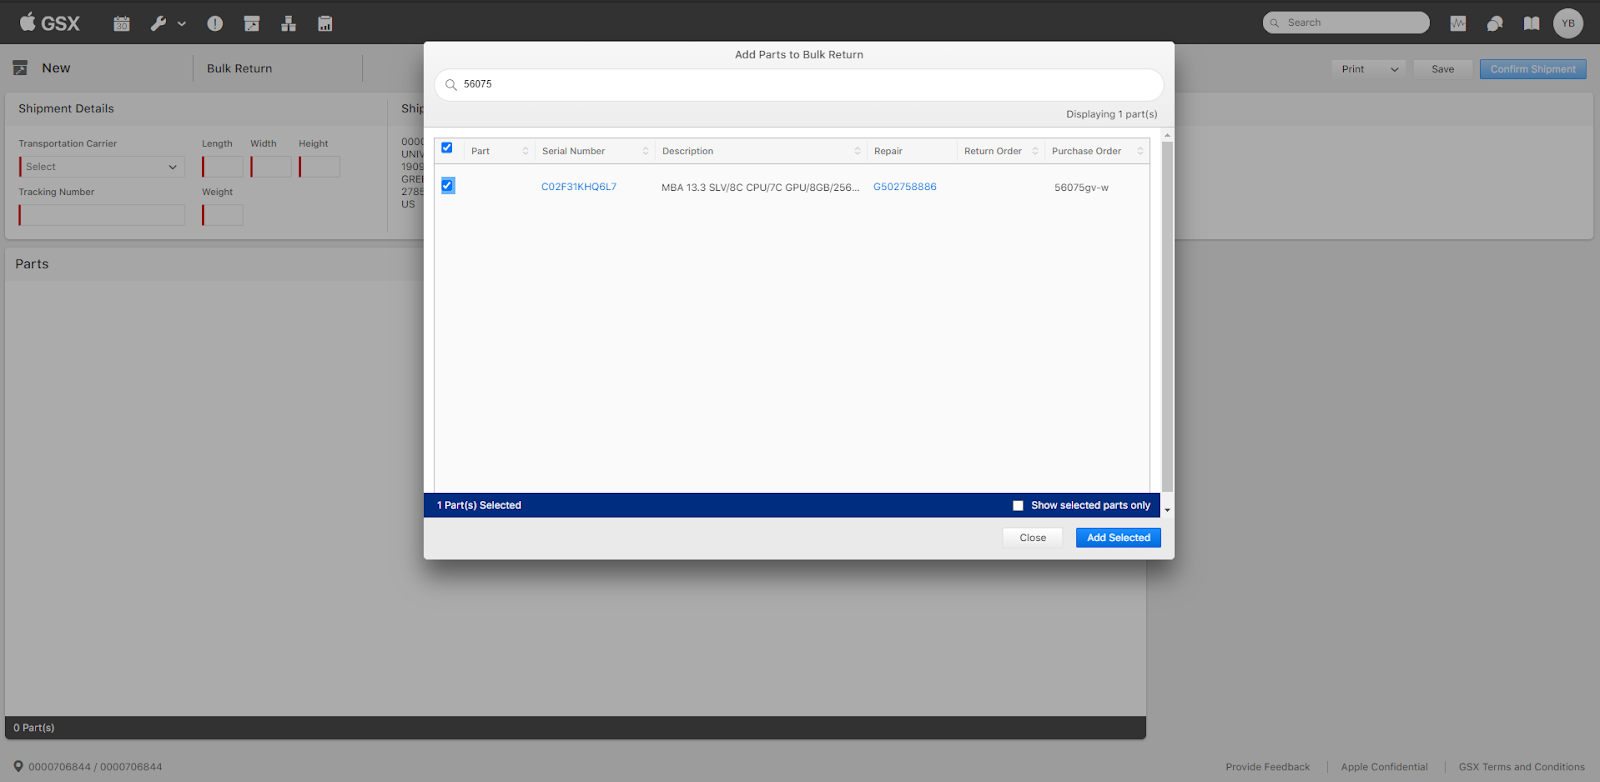
Once you have all the parts selected that will be packed in the same box, click the blue button labeled Add Selected. It is very important to make sure all the items selected will fiit in the designated box or padded pack you are using to ship the parts back to Apple. If you have more parts selected than will fit in your package you will need to remove the excess or use a larger box or padded pack.
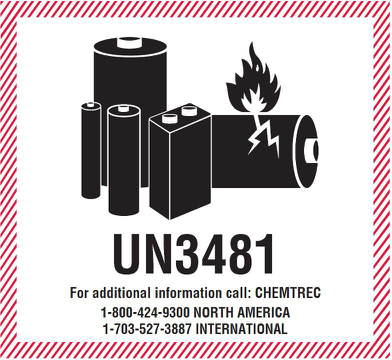
Batteries must be shipped separately from all other parts. The packaging must also include a UN3481 shipping sticker2
You will see the selected parts appear in the Parts section of the bulk return screen. Go to the Overpack Box column. You will see each part has a small drop-down menu.
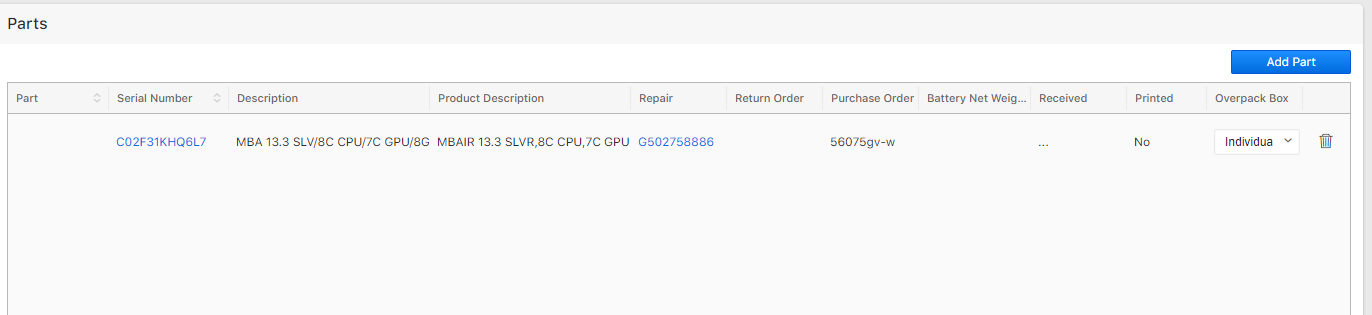
Since all the parts will be shipped in the same box/padded pack, you will select “1” from the drop-down menu for each item.
After this, you will click Save in the top right corner. The page will refresh and you will now see a bulk return number in the block previously labeled New.
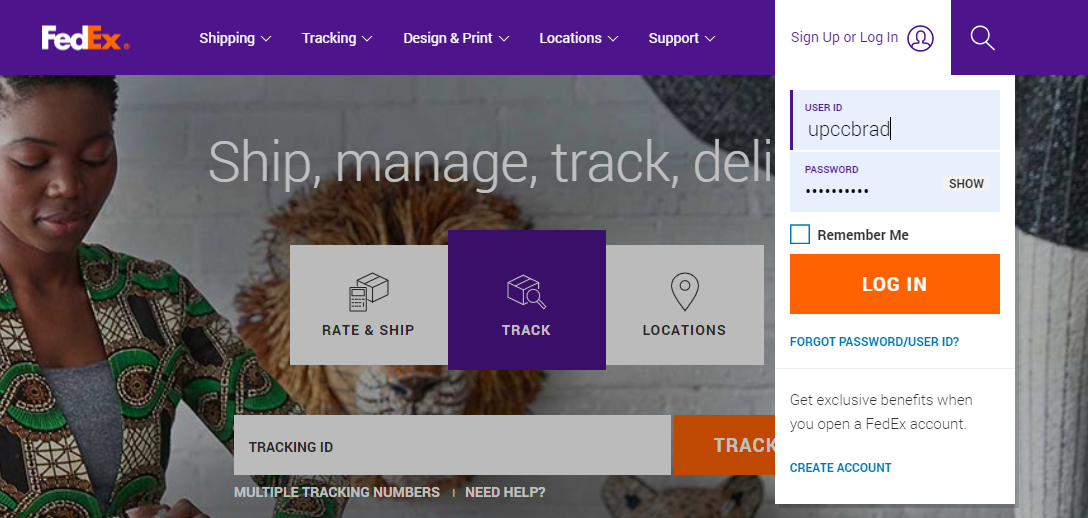
Next, you will go to FedEx and log into the Apple-provided account.
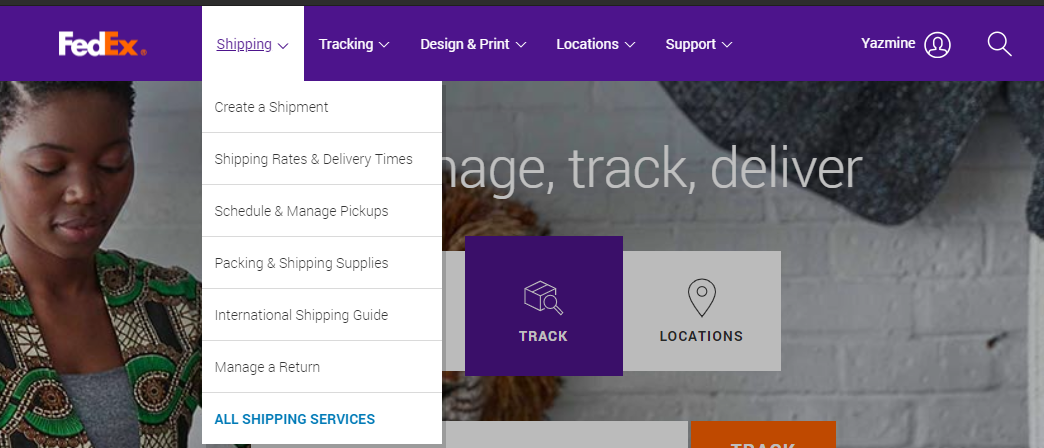
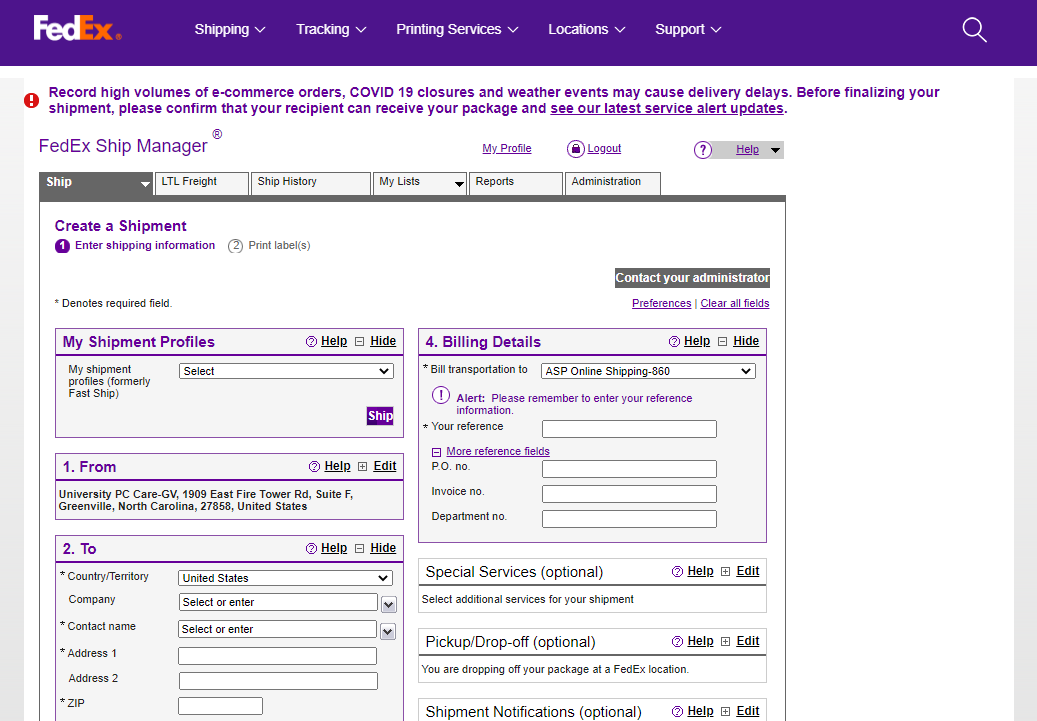
Click on Create a Shipment. Work your way through the page.
Ensure the From is set to the location you are currently working from.
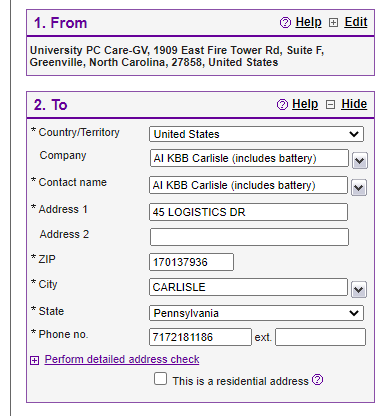
Set the To location to AI KBB Carlisle (includes battery), 45 Logistics Drive, Carlisle, PA.
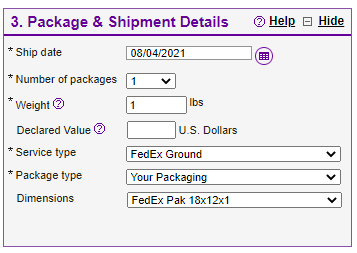
In section 3. Package & Shipment Details, make sure to enter your package details. Enter the dimensions manually or select a package size from the drop-down menu.
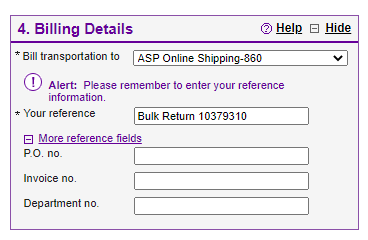
Next, you’ll copy and paste the Bulk Return number and enter it into 4. Billing Details under *Your Reference. *Use the format shown in the image below.
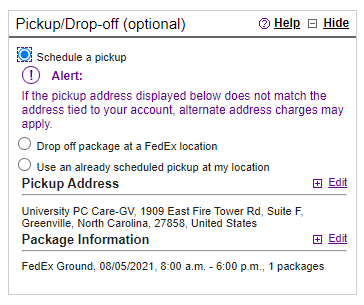
Always schedule a pickup when you create a shipment. Make sure the pickup address is set to the location you are currently at.
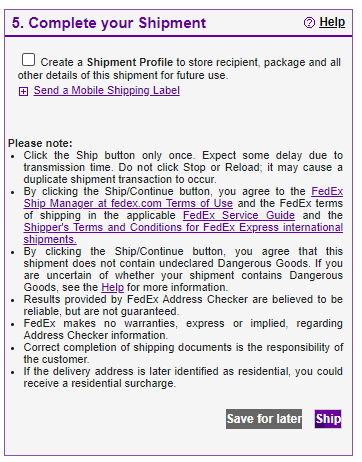
In section 5. Complete your Shipment, click the purple button labeled Ship. _Do not_ click the checkbox to Create a Shipment Profile.
On the Confirm your Shipment Details page, this is the last chance to make any corrections before generating the shipping label. Once you are confident the information is correct, select the purple button Ship. It will then load into the shipping label.
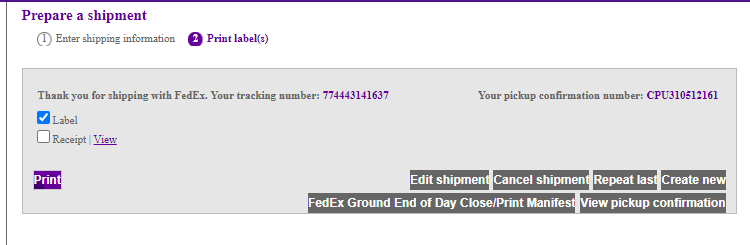
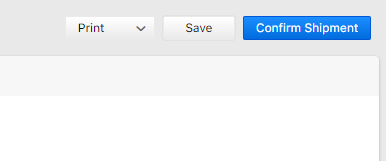
Click the Print button, physically print the label as well as print to PDF to save a digital copy. Back in GSX on the Bulk Return page, fill in the Shipment Details based on the information you entered in FedEx to create the shipping label.
Once you have all the information entered, click the blue button labeled Confirm Shipment to the right.
After the Bulk Return has been confirmed, click Print to see the drop-down menu. Select both options- All Return Labels and Packing List. This will start a download of the documents for the return.

Print the part labels and the packing list. You will need to place each label into its respective box (match the Work Order IDs to the boxes being returned). The labels need to be in their matching box and the box taped shut. After you have done this, place the individual items in your intended shipping box/padded pack. Before you seal your box/padded pack, fold and place the Packing List into your box/padded pack.
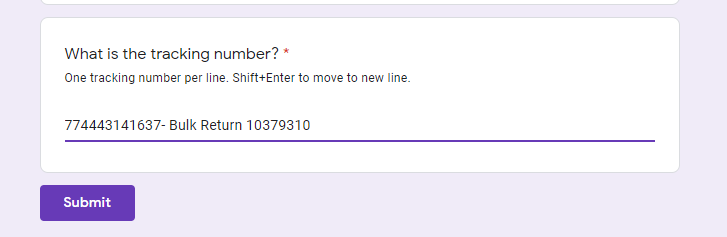
Now that your Bulk Return has been packed and appropriately labeled, add this shipment to the Outgoing Shipment Log. At the bottom of the form, enter the tracking number as well as what the tracking number is for. Use the format shown in the image below.
Finally, click submit and place the package in the designated FedEx pickup location in the shop.
Uploading Documents
Now that the package is ready for pickup, it is time to organize the documents. You will need to retain copies of all the Return Labels, Packing List, and FedEx Shipping Labels. These will be uploaded to the GoogleDrive folder Apple Consignment. This folder is available to view by all University PC Care employees with a company email address.
There are three folders in the Apple Consignment folder.
- Fire Tower
- Glenburnie
- RMAs
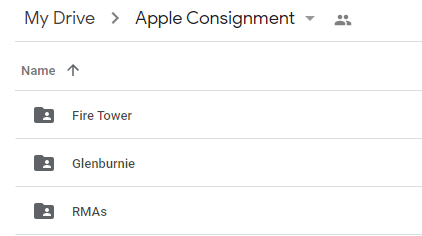
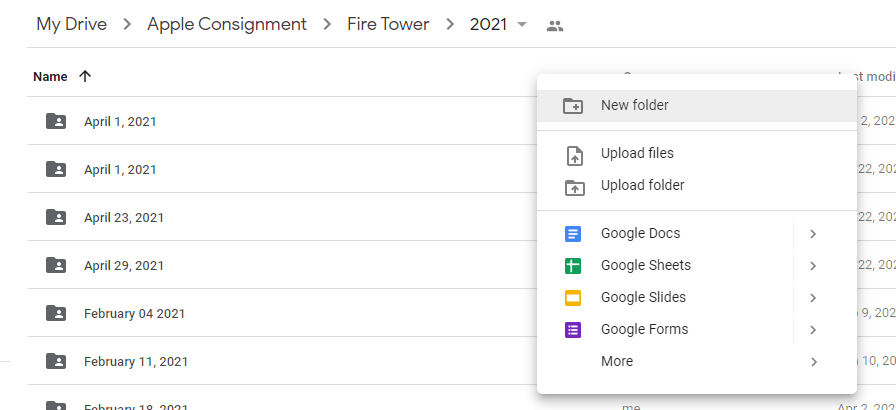
Select the folder for the store you just did the Bulk Return for. Then select the folder with the correct year.
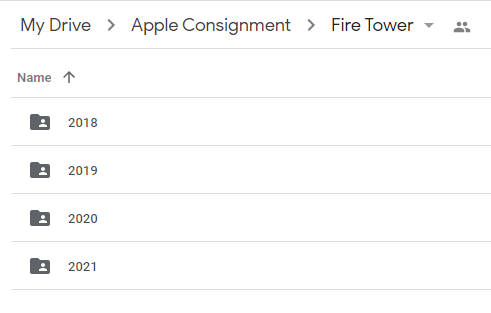
In this next subfolder, right-click on the free space next Name and under the folder title. Create a New Folder and label it with the date you created the Bulk Return.
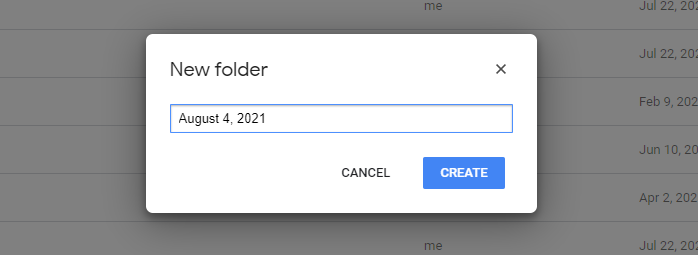
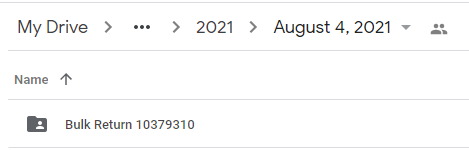
Click to enter the newly created folder. In this folder, you will select to create another New Folder, this one will be named after the Bulk Return the documents are for. Use the same format shown below.
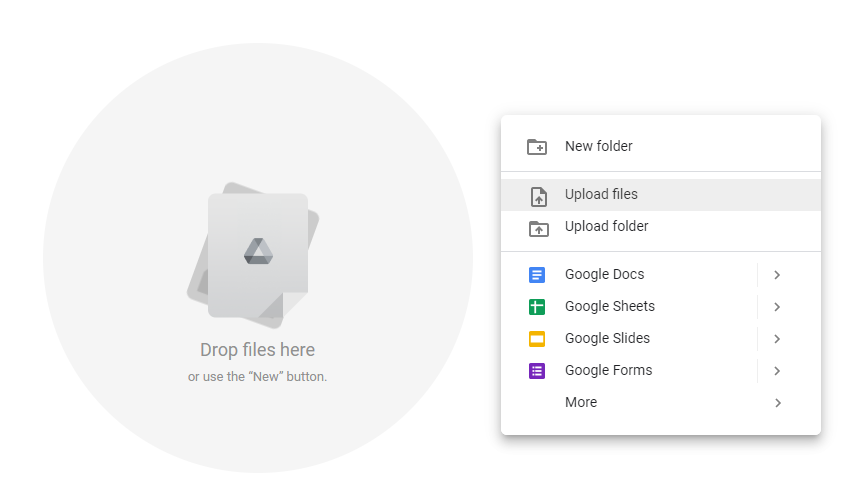
You can upload the documents one of two ways, drag and drop the documents from where you currently have them on your computer or you can right-click anyway in the blank area and select to Upload Files.
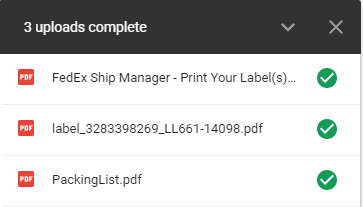
You will see the documents being uploaded in the bottom right-hand corner. The upload box will show green checkmarks once the documents have successfully uploaded to GoogleDrive.
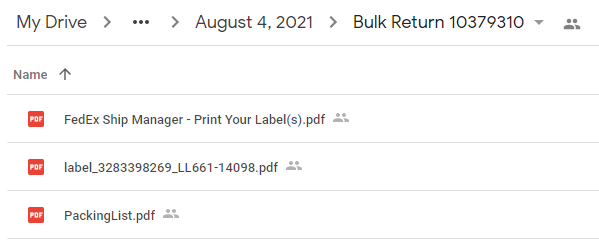
The GoogleDrive should look similar to the image below after the upload is completed.
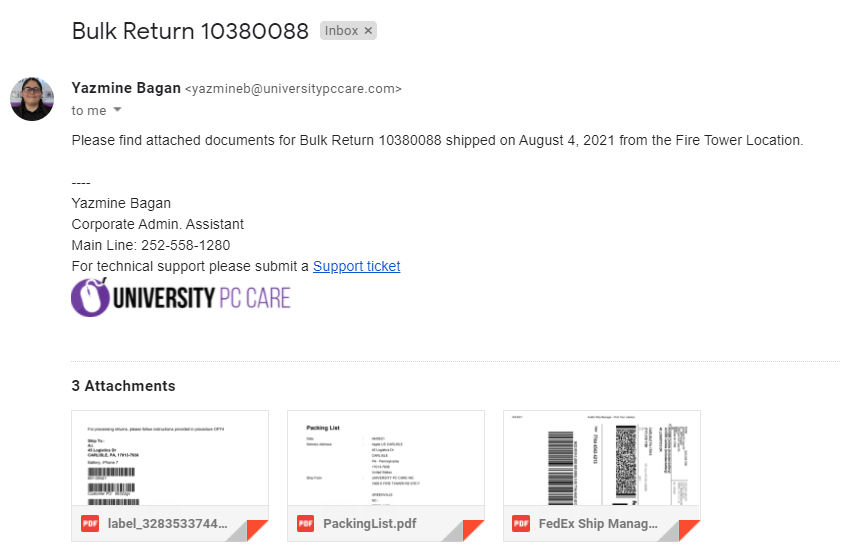
If you are unable to upload the documents to GoogleDrive, email the Bulk Return documents to the Corporate Administrator to upload on your behalf. Use the image below as a format template on how to email the documents to be uploaded.