Linking Subs
This article covers how to link Stripe subscription to the customer's PCRT device asset.
After a customer has been signed up properly through the website for a subscription or after manually creating a subscription in Stripe, a notification will appear in the _integration_ channel of Slack. From here you can link the subscription to the corresponding PCID in PCRT.
It will be easier to have multiple web browser tabs open in order to complete the linking process. You will be going between multiple pages to complete this task.
Note: Some customers may have more than one asset (PCID) with us throughout their history. Ensure you are linking to the asset that shows a recent purchase of a Care Plan. For example, do not link a subscription to a PCID showing the device as an iPhone when they purchased Mac Care Yearly.
Linking Subscriptions
Once the subscription has been created, either through the website (Care Plan or CareDrive) or manually (BizCare, NetCare, etc), a notification will appear in the Integration channel of Slack. You will need to be a member of this channel to receive the notification of a new subscription. The notification will look similar to the image below:
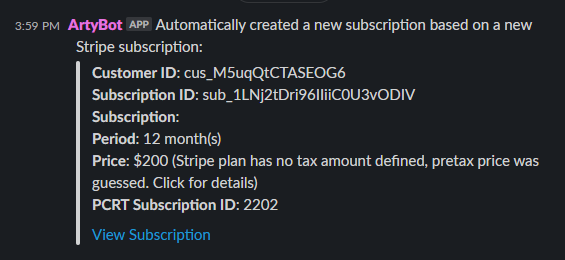
Click, View Subscription on the notification. This will take you to the PCRT subscription page.
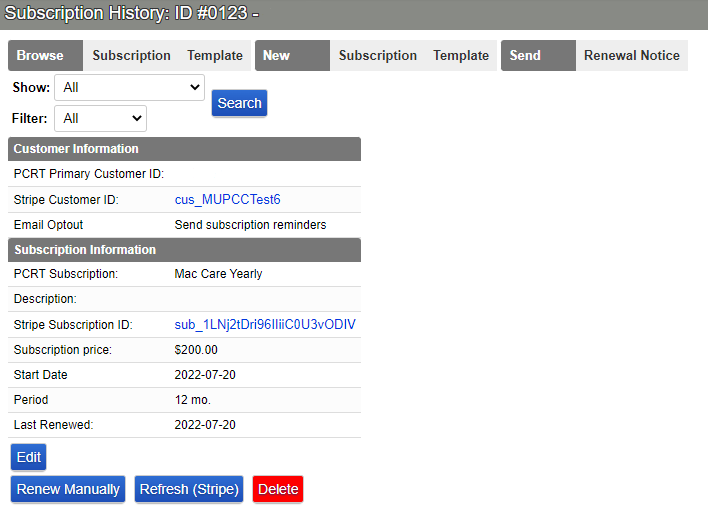
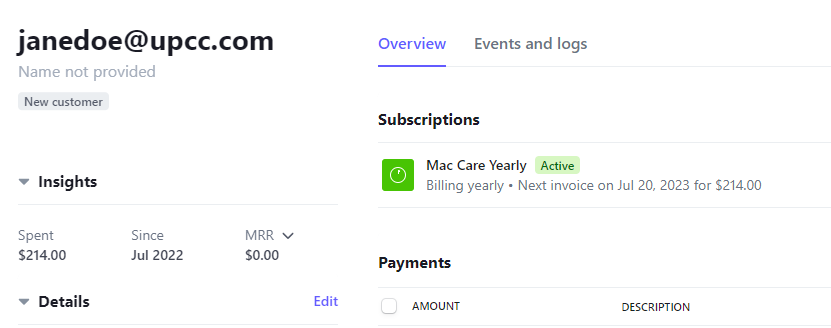
The page will have links to both the subscription and customer page in Stripe. Click the link listed as Stripe Customer ID. Copy the email address listed on the customer page in stripe.
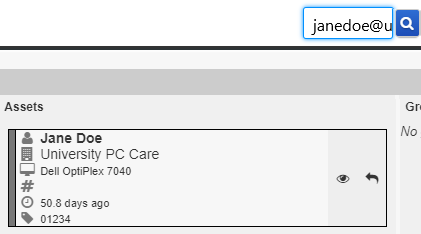
Paste the email address into the search bar of a new PCRT window. All assets associated with that email address will populate in the search results. If there are multiple assets with this email address listed, look at the clock on the quick asset information that shows in the search results. Click on the asset with the most recent date.
By clicking the asset, you will be taken to the most recent Work Order (WO). On this page verify the customer information matches the email address you have. Also, check the cart and receipt to make sure the plan has been paid for. This is another way to verify this asset matches.
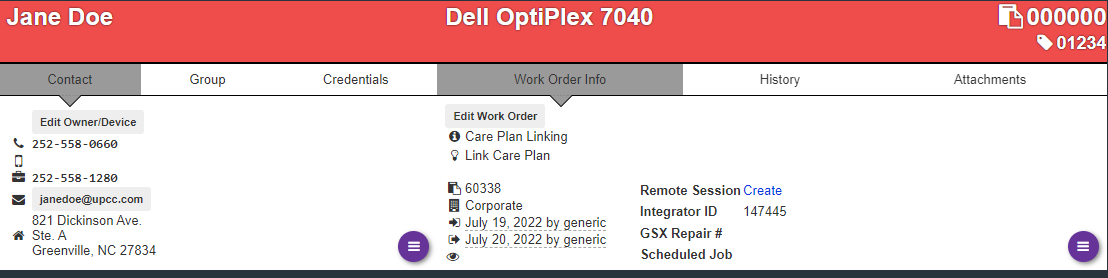
Once you’ve verified this is the correct asset, copy the PCID located in the top right corner of the WO with the tag symbol. Take this number back to the initial subscription history page
On this page, click the blue Edit button. Go down this sheet and edit the information as follows:
- Select the Customer Type: one of these options has to be selected to move forward.
- Subscriptions for companies will be tied to their group. You can find the group ID in a similar fashion to the PCID.
- Paste the PCID/Group ID into the text field labeled Primary Customer ID#
- Select the correct Subscription Category from the dropdown menu. If there is not an option that matches, leave blank.
- Type the name of the subscription into the Subscription Name text field.
- Leave the Subscription Description blank unless there are specific details that need to be included for future reference, i.e. special discount applied or trade.
- In general, you will not have to change the Subscription Start Date unless the subscription is being trialed to a specific date.
- For example, a BizCare subscription being created on the 20th but will begin billing on the 1st of the following month.
- The subscription length and cost should remain the same.
- For subscriptions with multiple device cover, such as BizCare or NetCare, you may need to adjust the pricing to reflect the correct number of devices being covered.
- Leave the Stripe Customer and Subscription IDs as they are. This is automatically generated from Stripe.
- Leave Service Contract as _no_
- For Email Opt-out, leave it marked to send reminders for subscriptions going to residential customers. Select _do not send_ for business customers.
- For Family Plans, enter the PCIDs for each device that will be covered under the plan into the text field labeled Additional Subscription Members. This will allow a subscription to be viewed from each asset and link back to the main asset.
Once the above items have been updated, click the red Submit button at the bottom of the page. You will be taken back to the subscription history page which will show the updated information. .

Back in Slack, go to the notice you received initially in the Integration channel. Hover over the message. In the top right, a menu will appear. Click on Reply in Thread. Post a message that says “got it” that way other representatives know it has already been taken care of.
When linking has been completed, go back to the Stripe customer page and update the customer information to match what is in PCRT. You will need to enter the customer’s name in two places, Name and Description. Continue scrolling down the Update Customer pop-up in Stripe with their remaining details. Click the blue Update Customer button to save the changes.
Subscriptions without matching PCID
In rare cases, a customer will sign themselves up for a Care Plan on their own before scheduling a remote appointment or dropping it off for service. In these cases, check the appointments calendar to see if a remote appointment has been scheduled. If you see an appointment matching the email you see listed in Stripe, create a new customer check-in for this appointment. Copy over the information from the Appointment to the new WO. After this has been made, complete the linking steps as usually.
If you are unable to locate an appointment and there has still been no check-ins with that email address, reply in a thread on the notification that you are unable to locate the customer in the system. Set a Slack reminder to remind you about the integration notice at some point the following day.
If you are still unable to locate a PCID that matches, send an email to the customer requesting a call to discuss the subscription they signed up for. Proceed with creating a new asset for the customer after they have reached out to us.