Manage Key Fobs for Access Control
Using the program
Getting to the Access Control program
- Login to the BizCare server, via ScreenConnect
- Open the Hyper-V Manager
- Double click the "Access Control" VM, which should be running
Login with the username and password for the Access Control server, listed in Bitwarden.
- Note: Because you are remoted into the BizCare computer and then accessing the VM, your clipboard may not be able to copy/paste to the VM.
- The password is in the "Mission Critical" Bitwarden folder.
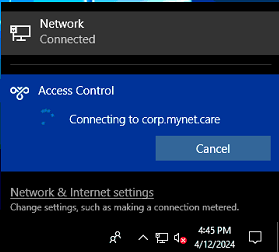
Click on the network icon in the system tray and connect to the "Access Control" VPN connection if it is not already connected
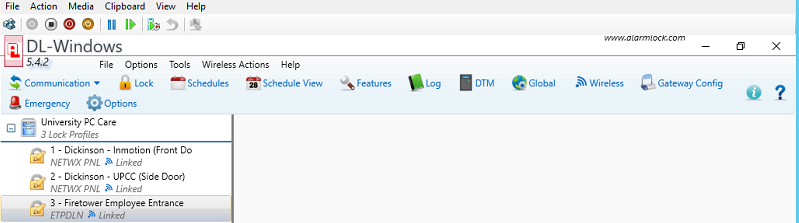
- Open the DL-Windows application (on the desktop or the start menu)
- If prompted for a login, the username is Administrator and there is no password
Create and manage Access Control users
Users are managed in the "Global" menu, in the application task bar at the top of the DL-Windows program.
- Open the "Global" menu item
- Click a name in the list on the left to edit that user, or click in a blank row to create a new user
Add or edit a user
- On the Global menu, click in a blank row to create a new user or click on an exist name to edit an existing user
- Add or change the first and last name
- For new users, click the "+ Add Card" button in the bottom left
On the Card Enrolling screen, edit 2 fields:
- Card Code: The 7 digit code on the back of the keyfob
- Facility Code: 19
- Click OK
Add or edit locks that this user can access, back on the Global Users page
To change lock enrollment for this user, double click one of the locks in the list on the Global Users page.
- Green: Access allowed
- Red: Access disallowed
- White: No decision (deny by default)
- When you are done editing users, you can close the Global Users screen and proceed to the "Push configuration changes" section to commit your changes
Push configuration changes
All configuration changes are saved locally on the Access Control server - changes are not automatically pushed out to the devices at physical locations. To push configuration changes:
- In the main interface of DL-Windows, click on the lock that needs to have its configuration updated. If multiple locks need to be updated, follow these instructions for each lock as only one lock can be selected at a time for communication.
- Click on the “Communications” menu icon, and from the drop down menu select “Communicate with selected Networx Lock”
- On the “Communication with…” window, select the settings that will be sent to the lock. If you are only updating users, select “Send Users”
Click “Start”
- DL-Windows will try to communicate with the gateway at the physical location and will report a success/failure upon completion. If the gateway cannot be reached, follow troubleshooting instructions below.
- Click “Close” when finished sending configuration changes to the lock.
Troubleshooting connection issues
On the Gateway Config window, gateways that can be reached are displayed in blue on the “IP Address” column. Gateways that cannot be reached will be displayed in red on the “IP Address” column. If any gateways show up in red:
- Make sure the VPN connection is connected on the Access Control server. If it isn’t, attempt to connect. If you still cannot connect, restart the Access Control server (not the BizCare server, just the virtual machine) and try again. If it still will not connect, troubleshoot VPN connection in Unifi Controller.
- If the VPN is connected, but still cannot communicate with gateway(s), revisit steps 2, 3, and 6 on “Gateway Configuration” section above. The network adapter may have changed.
- Ensure that the gateway device (a white box, powered by PoE, with the ethernet port in the bottom of the unit, usually in or around the network rack) at the physical location are powered on and that their MAC address in the Unifi Controller match the MAC address in the Gateway Configuration window in DL-Windows.
Initial Configuration
VPN Setup
The Access Control server can only communicate with the doors if it is connected to the Corporate VPN. The VPN is already configured, this information is only for record keeping.
The settings configured on the Access Control server are:
- VPN Provider: Windows
- Connection Name: Access Control
- Server name or address: corp.mynet.care
- VPN Type: PPTP
- Type of sign-in info: User name and password
- Username: accesscontrol
- Password: Stored in Bitwarden → Mission Critical Folder as “Access Control VPN user”
Once configured (and after restarting the server) you must connect to the VPN before being able to push configuration changes to the remote locks. If you are unable to connect to the VPN, restart the Access Control virtual machine and try again.
Gateway Configuration
Each physical location will have a gateway configured in DL-Windows. The gateway is a physical device at that location that controls the locks locally. The local device and its connected doors will continue to function with the last known configuration sent from the Access Control server, even if they cannot communicate back to the server.
The Access Control server’s VPN connection must be connected to enable communication with the gateway(s). See the “VPN Setup” section for more details.
To configure a gateway:
- Working with Ardent Access (Aaron Penny), setup the gateway device at the physical location and assign it a static IP address.
- Open DL-Windows on the Access Control server and login as Admin user
- Click on “Gateway Config” menu button at the top of DL-Windows main interface
- On the Gateway Configuration window, click on the Gateways menu option and then “Manually Add a Gateway”
On the Manual Gateway Addition window:
- Set the DHCP Name to the name of the device (usually ALARMLCK) as it appears in the Unifi Controller clients list for the site where the gateway is located.
- Set the Gateway MAC address to the MAC address of the gateway at the physical location. Format in all caps, with no colons (ie, AABBCC001122).
- Save the gateway
- DL-Windows will attempt to communicate with the configured gateway. If successful, the new gateway will appear on the Gateway Configuration window with its “IP Address” column highlighted in blue.
On the Gateway Configuration window, click on the Gateways menu item and then “Select Network Adapter”. Set the Network Adapter to “Access Control” if it isn’t already, then click Save.
- If “Select Network Adapter” is grayed out, you may have started the VPN after opening DL-Windows. Close DL-Windows and reopen it after the VPN connection has been established.