How to use Tech Tools
Tech Tools is a bootable diagnostic and backup/recovery environment for Mac computers
You can use Tech Tools to:
- Run hardware diagnostics in addition to AST2, or where AST2 cannot be used
- Begin data backup operations (e.g. for Data Migration)
- Begin data recovery operations for Macs (e.g. for failing or accidentally formatted drives)
Currently, Tech Tools is run from external USB disk drives. Each will be labeled with blue tape indicating which versions of Tech Tools are installed on the external drive.
Determine which Tech Tools version to use
There are currently 3 primary versions of Tech Tools, where the version (10.12, etc) corresponds to the version of macOS on which it is installed:
- Tech Tools 10.12: For any device that does not recognize APFS file systems (generally, devices made between 2012 and 2014)
- Tech Tools 10.15: This should be the default choice for most devices.
- Tech Tools 12: Newer devices, 2018+
If you are unsure which version to use, consult with another employee. Optionally, visit https://everymac.com to lookup the computer model to find the “Maximum OS” supported for this device and use the appropriate Tech Tools version.
Boot into Tech Tools
- Shutdown the computer
- Insert the Tech Tools USB disk drive
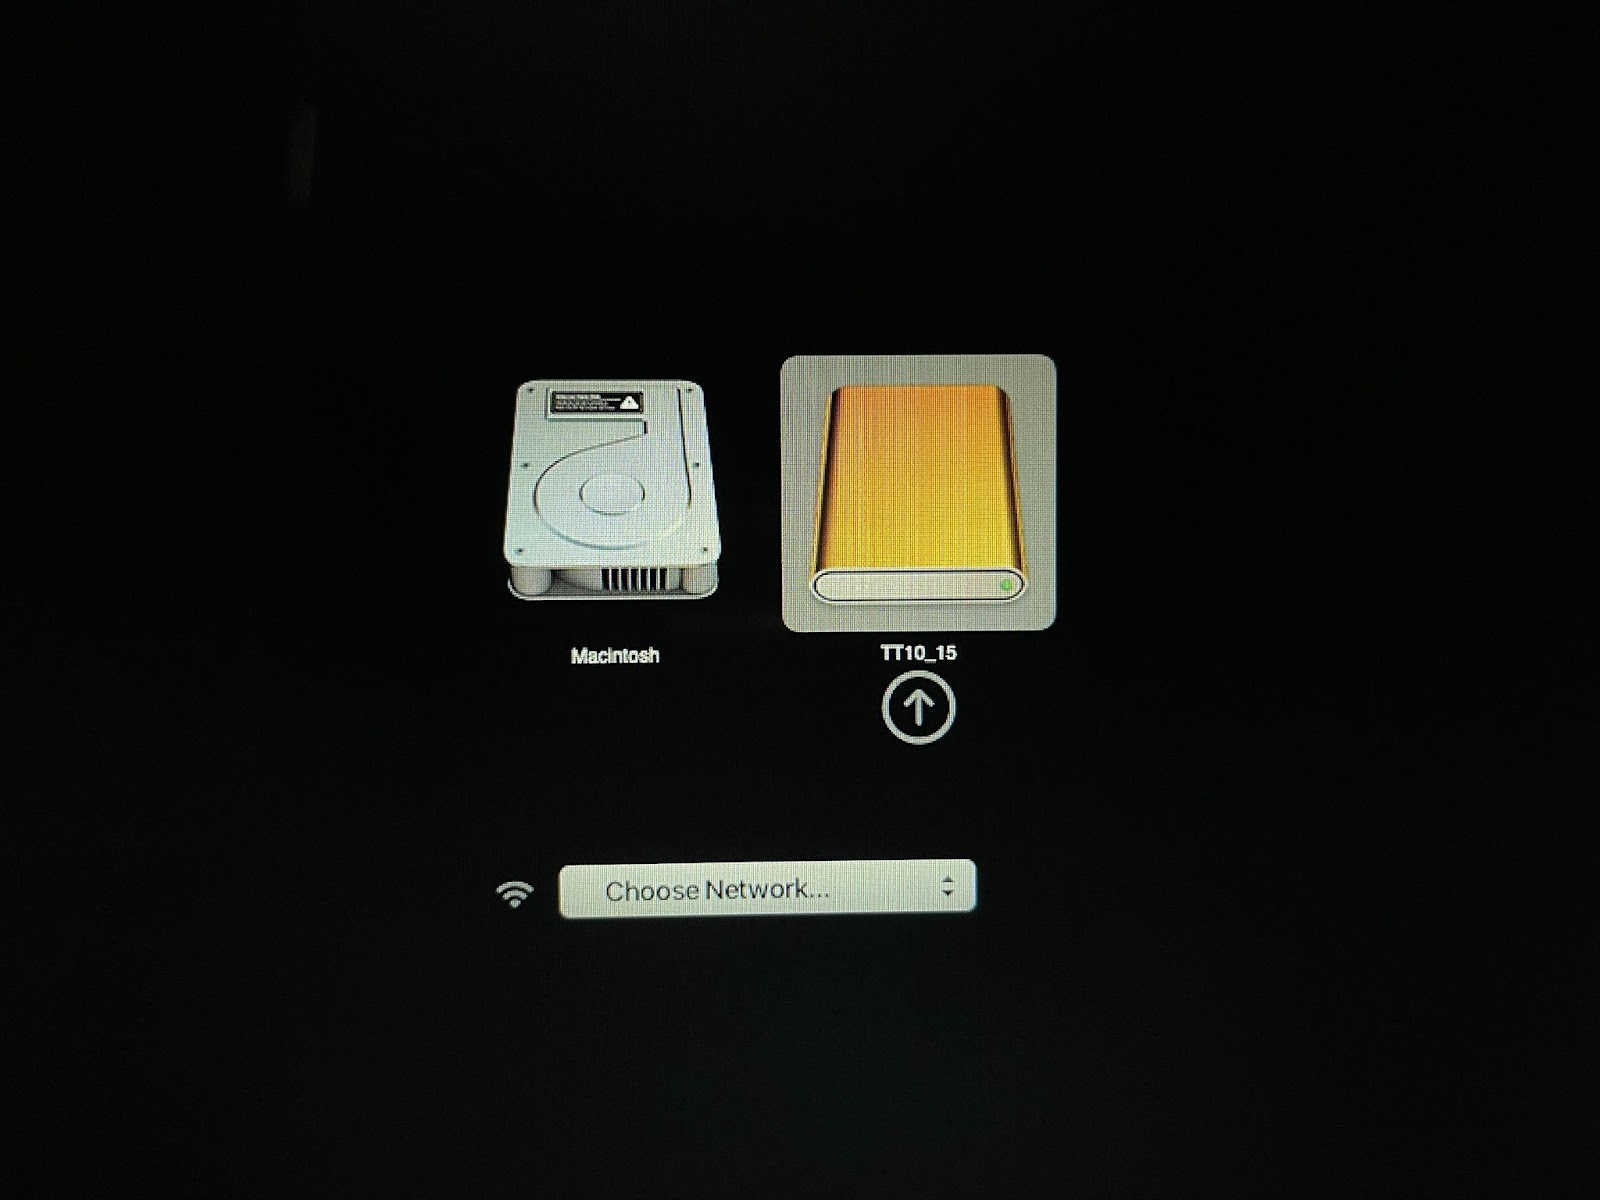
- Boot to the Start Up Menu
- For Intel based computers, hold the Option key (Alt on windows keyboards) after letting go of the power button
- For Silicon based computers, hold the power button for about 10 seconds until you see the message "Loading startup options"
Select the version of Tech Tools appropriate for this computer
Running diagnostics
- After booting to Tech Tools, run the "Tech Tools" application from the dock to begin diagnostics.
- Make sure "Check computer" is selected, then click "Run Check Computer" to do a complete hardware diagnostics of the machine, which may take several hours to complete
- Once complete, the results will appear on the same page. Record the results in the Work Order in PCRT
Backing up data (Carbon Copy Cloner)
Carbon Copy Cloner (CCC) is used to create full image backups of the customer’s device for data migrations, reloads, and data recovery.
To use Carbon Copy Cloner:
- Open CCC from the dock
- Ensure the “Copy All Files” option is selected, underneath the Source option
Choose a Source and Destination
- Source: The customer’s storage device. This will normally be called “Macintosh HD”. If there are is a second option similar to “Macintosh HD - Data”, select that option
- Destination: Where the backup image will be stored. Choose “New Disk Image”
- Browse to Mac Backups on the network. This network destination should automatically be listed in the “Location” tab in Finder
- Navigate to MacBackups → Mac Backups. If prompted to “Connect As” or enter a username and password, enter the credentials as provided by the Store Manager
- In the “Save As” field, name the backup according to the PCID and the customer’s last name. For example, for PCID 12345 belong to John Doe, the name should be “12345doe”

- Click OK to confirm the destination image name and location
- Double check that the source location is the customer’s drive, and that the destination is an image on the Mac Backups server. Once confirmed, click “Clone” to begin the clone operation
- If additional windows pop up, click “Continue Anyways” until the clone operation begins
The clone may take several hours to complete depending on how much data the customer has, the speed/age of their computer, and the state of the source drive
When finished, verify that the image on the Mac Backups server matches the estimated size of the backup from CCC.
Disk Drill
Disk Drill is used to recover data in situations where the drive has been formatted, the drive is failing, or when data has been corrupted, lost, or accidentally deleted.
To use Disk Drill:
- Get the work authorized by the customer. Recovery is $120 minimum, up to a maximum of $240 depending on the severity and complexity of the data loss.
- Get an idea of what kind of data the customer is looking for. "Everything" or "whatever you can get" are not acceptable answers.
- Ask for specifics about the contents. File names and folder structures tend to get lost in data recovery operations, so getting file and folder names is usually not sufficient. "Word document of my thesis" or "pictures from a family reunion" are much more descriptive. Dates are helpful as well, as the date the file was created is usually recoverable
- Inform the customer of a typical 2-3 week turnaround time
- Remove the drive from the customer’s device, label the drive with the customer’s PCID (in sharpie, directly on the drive when possible; otherwise use a removable label)
- Connect the drive to the Shop Linux machine
- Inform the Data Recovery Specialist of the data recovery job, where it’s plugged in, and the details of the drive ("a 1TB Seagate drive connected to the Linux machine") is sufficient