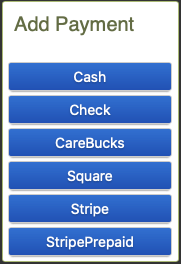
Different types of payments
Customers have multiple ways they can pay for their repairs. We will cover the specifics of each payment type.
Cash
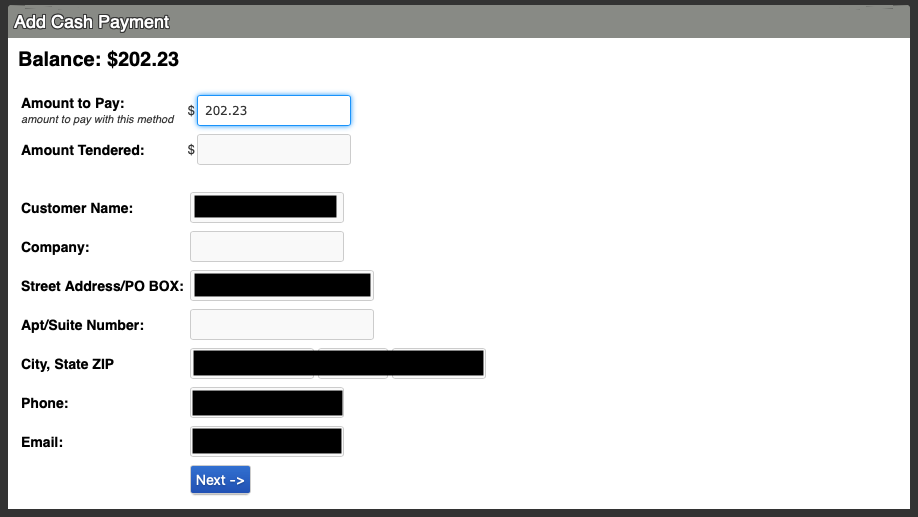
After proceeding to checkout for a customer, select “Cash” from the Add Payment section.
- When adding the cash payment, the Amount Tendered is the amount of cash the customer hands you, while the Amount to Pay is how much the customer wants to pay towards their balance.
- After entering the amounts, click the “Next” button.
Follow checking out the customer by picking up from step 7 under “Check Out” to finish helping the customer.
Debit/Credit Card at the front counter
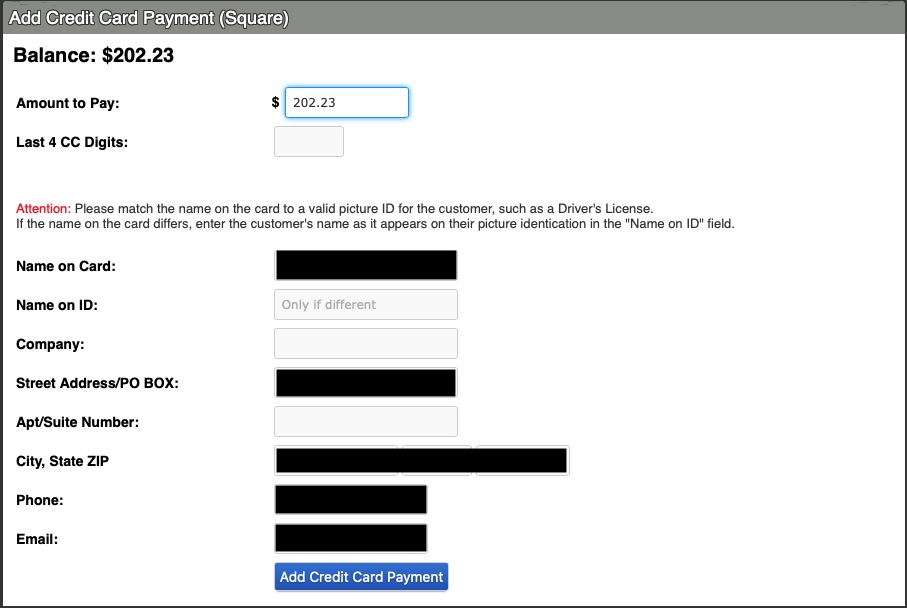
After proceeding to checkout for a customer, select “Square” from the *Add Payment *section.
- By default the Amount to Pay will match the Balance, you only need to alter it if the customer wants to use multiple forms of payment.
- Make sure you fill out the Last 4 CC Digits and as much of the customer information as possible.
- Once all of their information is in you can hit “add Credit Card Payment” button
Follow checking out the customer by picking up from step 7 under “Check Out” to finish helping the customer.
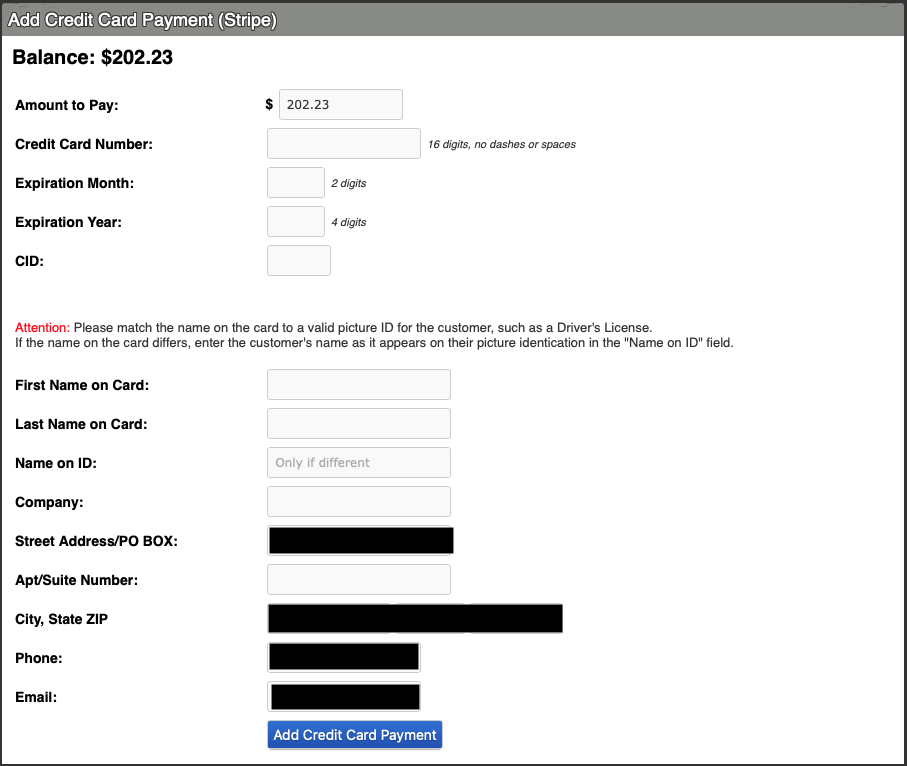
Debit/Credit Card over the phone or onsite
After proceeding to checkout for a customer, select “Stripe” from the *Add Payment *section.
- By default the Amount to Pay will match the Balance, you only need to alter it if the customer wants to use multiple forms of payment.
- Make sure you fill out the Card Number, Expiration Date, and CID. Additionally as much of the customer information as possible.
- Once all of their information is in you can hit “add Credit Card Payment” button
Follow checking out the customer by picking up from step 7 under “Check Out” to finish helping the customer.
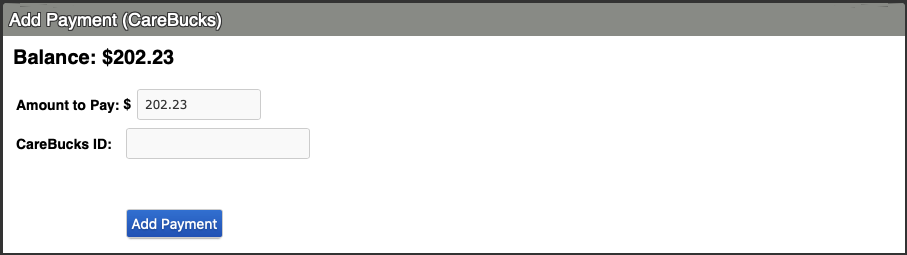
CareBucks
After proceeding to checkout for a customer, select “CareBucks” from the *Add Payment *section.
- By default the Amount to Pay will match the Balance, you will need to edit it to match the amount of CareBucks they have with them. Additionally CareBucks only applies to labor, so make sure the amount applied does not exceed the labor costs. (There is a standard $60 to all repairs except diagnostics).
- Enter the CareBucks ID shown on the receipt the customer brought in.
- Click “Add Payment”
Follow checking out the customer by picking up from step 7 under “Check Out” to finish helping the customer.
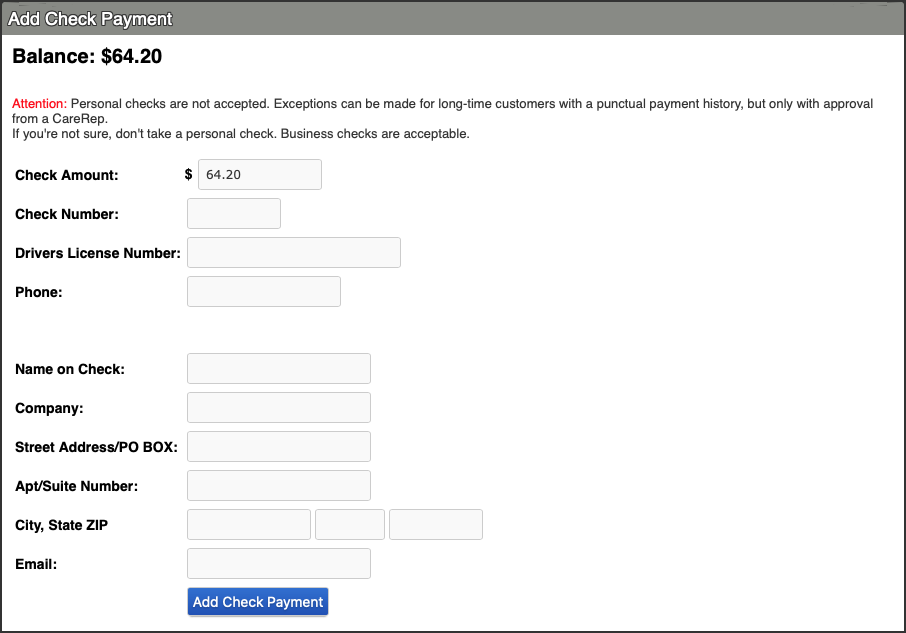
Business Checks
As a reminder, we DO NOT accept checks from customers. Only checks from businesses are approved.
After proceeding to checkout for a customer, select “Checks” from the *Add Payment *section.
- By default the Amount to Pay will match the Balance, you need to edit it so that the “Check Amount” matches the amount on the check.
- Fill out the boxes “Check Number”, “Drivers License Number”, and “Phone number”. Then fill out as much of the customer information as you can.
- Click “Add Payment”
Follow checking out the customer by picking up from step 7 under “Check Out” to finish helping the customer.